Why You’ll Love This Braised Beef Short Ribs Recipe
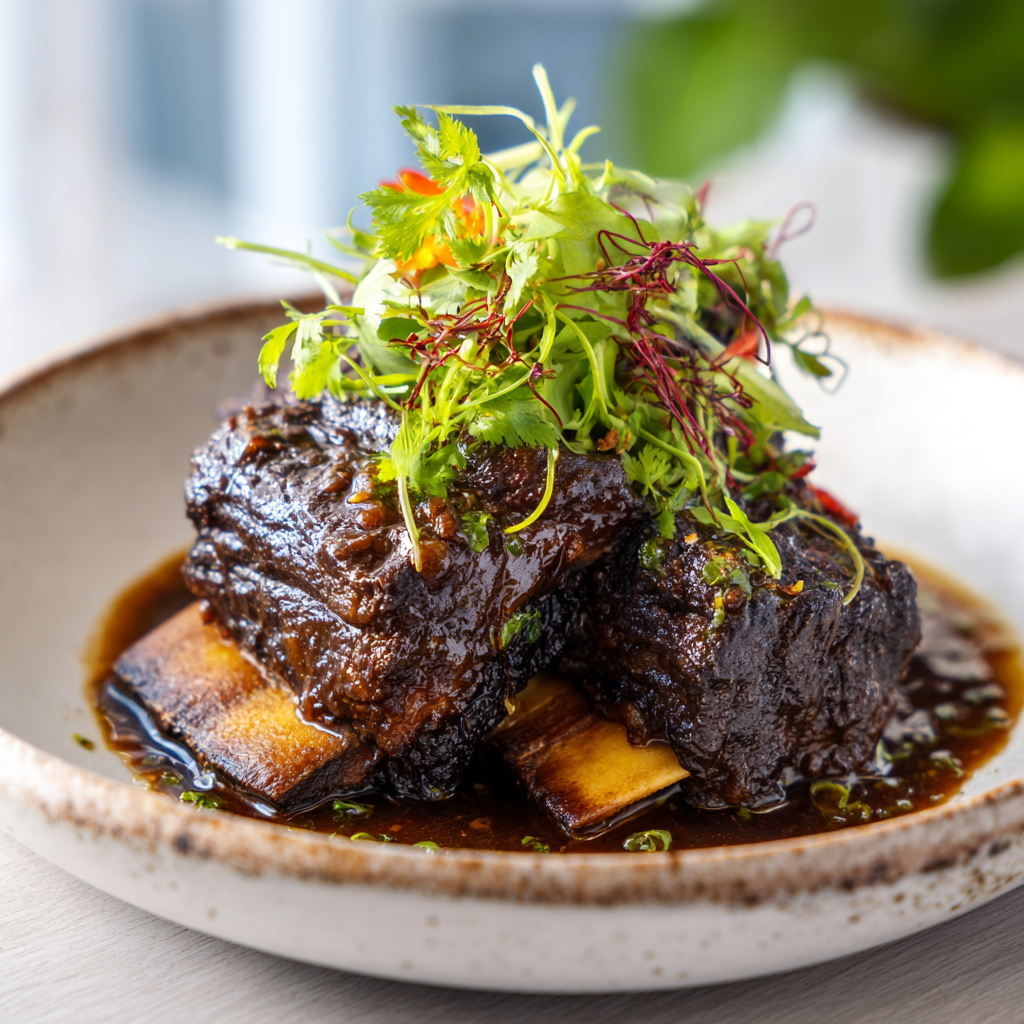
You know that moment when you take the lid off and the meat is just falling off the bone? That moment when the whole kitchen smells like a fancy steakhouse and you didn’t even break a sweat? That’s what this braised beef short ribs recipe is all about.
I’m not gonna lie – my first attempt at braised short ribs was a disaster. I rushed the sear, used too much liquid, and ended up with gray, tough meat swimming in a watery broth. My husband tried to be nice about it, but we both knew. So I went back to the drawing board and figured out what actually works.
This version? It’s the one I make for every summer gathering now. Fourth of July, Father’s Day, even just a random Tuesday when I want to feel like a rockstar in the kitchen. The best part? It only takes 3 hours from start to finish. I promise this 3-hour version delivers the same fall-apart tenderness that usually takes all day.
And since it’s summer and nobody wants to heat up the whole house, I’ll show you how to do it on the stovetop too. Trust me, this is the recipe that’ll make you the hero of the cookout.
Ingredients for Braised Beef Short Ribs
Here’s the thing about this recipe – the ingredient list is short and smart. No weird stuff you’ll never use again. Just solid, flavorful components that work together to create that rich, glossy gravy.
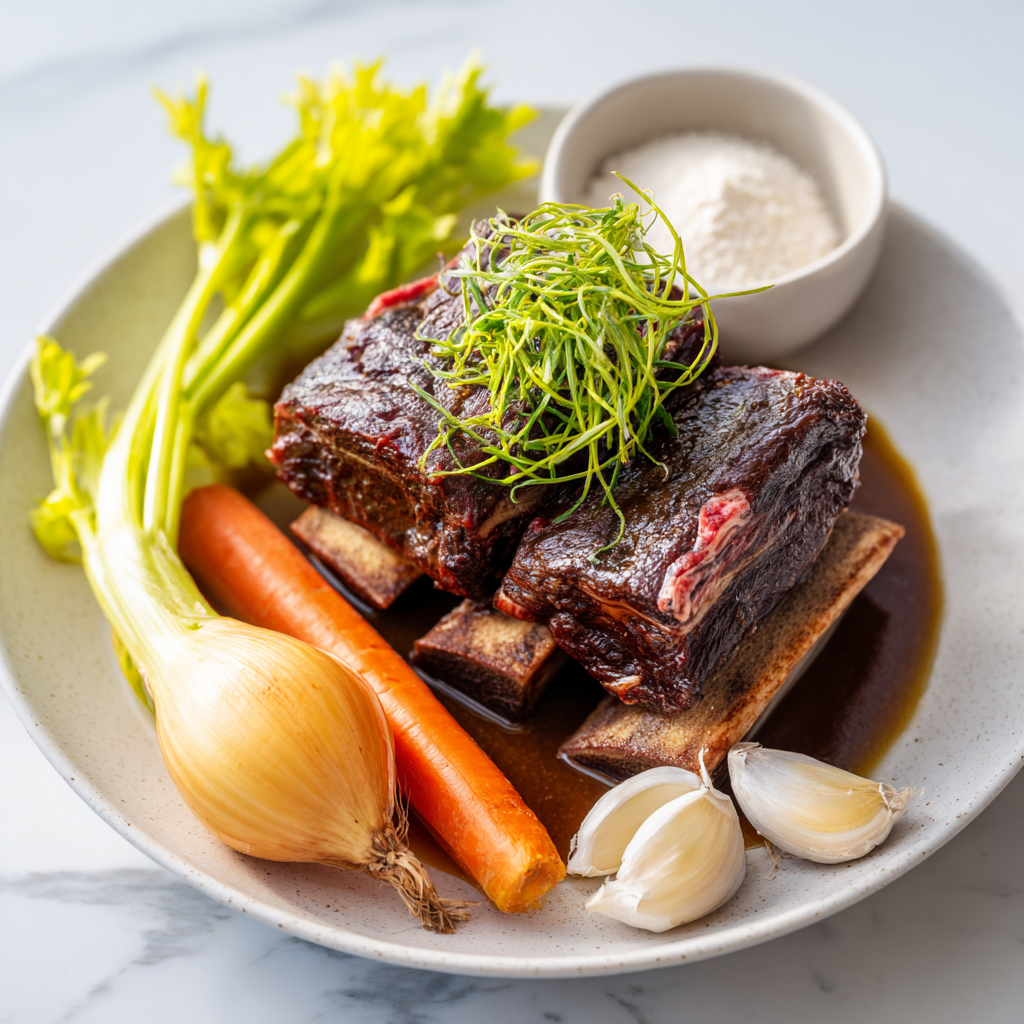
- Bone-in beef short ribs – Go for 2 pounds total. The bone adds flavor and helps keep the meat moist during the long braise. English cut is ideal, about 2-3 inches thick.
- California olive oil – For searing. A good quality oil makes a difference here.
- All-purpose flour – This does double duty. It helps create that deep crust during searing and thickens the braising liquid into a natural gravy.
- Yellow onion, carrots, celery – The classic mirepoix for braising. They break down during cooking and add sweetness and body to the sauce.
- Garlic – 8 cloves, smashed. Don’t skip this. Smashed cloves release more flavor than minced.
- Italian seasoning, light brown sugar, tomato paste, Worcestershire sauce, bay leaves – This combo gives you that deep, savory-sweet flavor profile. The brown sugar balances the acidity, the Worcestershire adds umami.
- Beef stock – 2.5 cups. Use a good quality store-bought or homemade. Low-sodium is best so you can control the salt.
- Kosher salt and freshly cracked black pepper – Season generously at every stage.
- Fresh parsley – For garnish. A sprinkle of green makes the dish pop.
One note on the flour – you’ll dredge the ribs in it before searing. Don’t skip this step. It’s the secret to that rich red wine sauce texture without having to add any extra thickeners later.
Essential Equipment for Braising Short Ribs
You don’t need a fancy kitchen to make this work. But having the right pot makes all the difference. Here’s what you’ll need:
- Dutch oven – This is the gold standard for braising. The heavy cast iron holds heat evenly and the tight-fitting lid traps steam, creating that moist environment that breaks down connective tissue. A 5-6 quart size is perfect.
- No Dutch oven? No problem. Use a heavy-bottomed pot with a lid, like a stockpot or a deep sauté pan. The key is something that retains heat and has a tight seal. If your lid isn’t snug, you can use foil underneath it.
- Slow cooker or Instant Pot – I’ll cover these variations later. They work great if you want a hands-off approach.
- Tongs – For flipping the ribs during searing. Metal tongs give you the best control.
- Wooden spoon – For stirring the vegetables and scraping up the browned bits from the bottom of the pot. Those bits are pure flavor.
That’s it. Nothing crazy. If you’ve got a Dutch oven and some basic kitchen tools, you’re ready to go.
How to Make Braised Beef Short Ribs
Alright, let’s get cooking. I’ll walk you through the four main stages. Remember, the full detailed instructions are in the recipe card at the bottom – this is the big-picture approach with all my tips and tricks.
Stage 1: Sear the Ribs
Start by preheating your oven to 325°F. While that’s happening, pat your short ribs dry with paper towels. This is crucial – wet meat won’t brown properly. Season them generously with salt and pepper, then dredge each piece in flour until evenly coated.
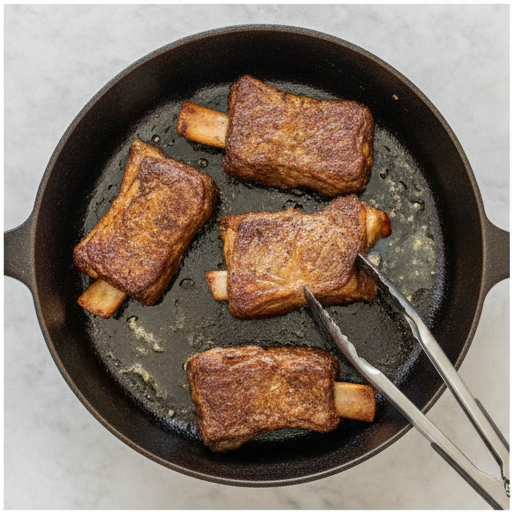
Heat the olive oil in your Dutch oven over medium-high heat. When it shimmers, add the ribs in a single layer. Don’t overcrowd the pan – work in batches if you need to. You want to hear that satisfying sizzle. Sear for 1 to 2 minutes per side until a deep golden-brown crust forms. Transfer to a plate and set aside.
The sizzle is your friend here. That sound means you’re building flavor. If the ribs steam instead of sizzle, your pan isn’t hot enough or you overcrowded it.
Stage 2: Build the Flavor Base
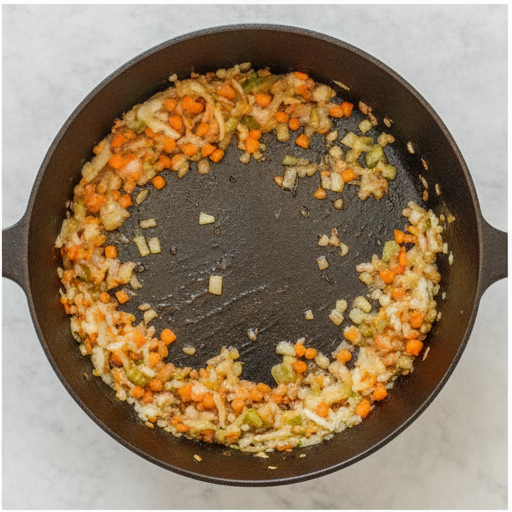
Without cleaning the pot (those browned bits are gold), add your chopped onion, sliced carrots, and celery with a big pinch of salt and pepper. Cook for about 6 minutes, stirring occasionally, until the vegetables start to soften.
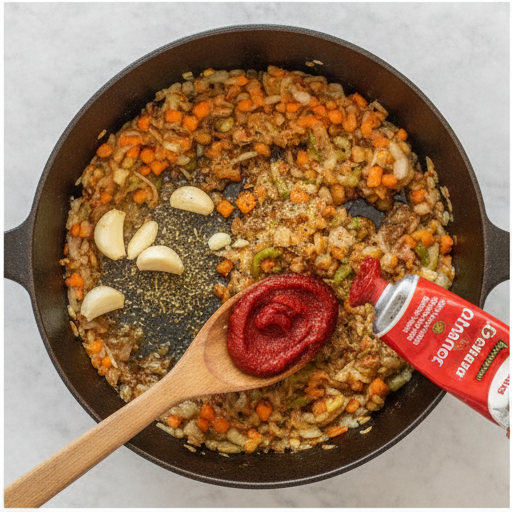
Reduce the heat to medium. Stir in the smashed garlic, Italian seasoning, tomato paste, brown sugar, and Worcestershire sauce. Cook for 2 minutes, stirring constantly. Your kitchen will start smelling incredible at this point. The tomato paste will darken and the sugar will caramelize slightly.
Stage 3: Assemble and Braise
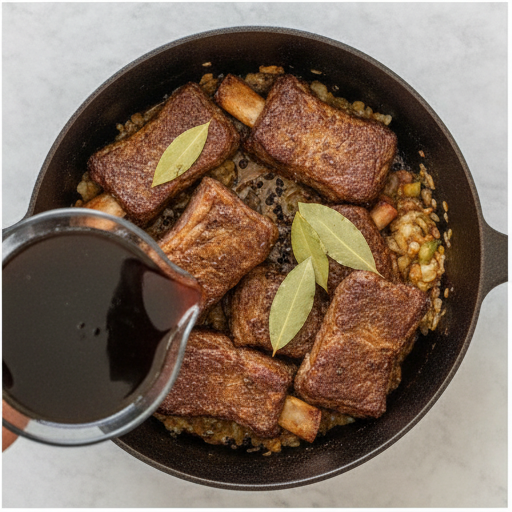
Return the seared short ribs to the pot, nestling them into the vegetables. Pour in the beef stock and add the bay leaves. The liquid should come about three-quarters of the way up the meat – not fully covering it. That’s the perfect braising liquid ratio.
Cover the pot with a tight-fitting lid and transfer to the preheated oven. Braise for about 3 hours. You’ll know they’re done when the meat is fall-apart tender and easily shreds with a fork. The meat will also shrink back from the bone slightly – that’s another visual cue.
Stage 4: Serve and Enjoy
While the ribs cook, prepare your favorite side dishes. Creamy mashed potatoes are classic – the gravy soaks right into them. Mac and cheese works great too. When the ribs are done, carefully remove them from the pot. The meat will be incredibly tender, so use a slotted spoon.
Serve the shredded beef over your chosen side, spooning some of the braising liquid as gravy. Garnish with fresh parsley and enjoy every single bite.
Tips and Tricks for Perfect Short Ribs
Over the years, I’ve picked up a few things that make this recipe bulletproof. Here are my top tips:
- Don’t skip the browning step. It builds essential flavor. I know it’s tempting to just throw everything in the pot, but that crust is where the magic starts.
- Pat the short ribs dry before seasoning and dredging. Wet flour turns into paste instead of crust.
- Work in batches when searing. If you crowd the pan, the meat steams instead of browns.
- Use bone-in short ribs for best flavor. The bone adds richness to the braising liquid.
- Cook low and slow at 325°F. Higher temperatures will toughen the meat.
- Liquid should come about 3/4 up the meat, not fully cover it. Too much liquid and you’ll end up with boiled meat instead of braised.
- Let the ribs rest for 5-10 minutes after braising before serving. This helps the meat reabsorb some of the juices.
Timing & Temperature Intuition
How to tell when they’re done without a thermometer: The meat should shred easily with a fork and pull away from the bone cleanly. If it resists, give it another 15-20 minutes. Also look for the meat to shrink back from the bone ends by about 1/4 inch. That’s a reliable visual cue.
If you’re short on time: Cut the ribs into smaller pieces before searing. They’ll cook faster but watch the timing – start checking at 2 hours.
Common Mistakes When Braising Short Ribs
I’ve made every mistake in the book so you don’t have to. Here’s what to watch out for:
- ❌ Not browning the beef enough. ✅ Take your time. A deep golden-brown crust adds layers of flavor you can’t get any other way.
- ❌ Overcrowding the pot while searing. ✅ Work in batches. Give each piece room to develop that beautiful crust.
- ❌ Using too much braising liquid. ✅ The liquid should come about 3/4 up the meat, not cover it completely. You want steam, not a bath.
- ❌ Cooking at too high a temperature. ✅ Stick to 325°F. Higher heat will make the meat tough and dry.
- ❌ Skipping the resting time after cooking. ✅ Let the ribs rest for a few minutes before serving. The juices redistribute, making every bite more tender.
- ❌ Not removing silver skin or tough membrane. ✅ Check the ribs before cooking. If there’s a tough silvery membrane on the bone side, remove it with a sharp knife. It won’t break down during cooking.
Storage and Reheating Instructions
One of the best things about this recipe? It’s even better the next day. The flavors have time to meld and deepen. Here’s how to store and reheat your braised beef short ribs:
To make ahead: Prepare the recipe through step 6 (the braise). Let the ribs cool completely in the braising liquid. Then transfer everything to an airtight container and refrigerate for up to 3 days. The fat will solidify on top – just scrape it off before reheating.
To reheat: Gently reheat on the stovetop over medium-low heat. Add a splash of beef stock if the sauce has thickened too much. Stir occasionally until the meat is warmed through. You can also reheat in the microwave in 30-second bursts, but the stovetop gives you better control.
To freeze: Cool completely, then transfer to a freezer-safe container. Freeze for 3-4 months. Thaw overnight in the refrigerator before reheating.
For meal prep: Portion the shredded beef and gravy into individual containers. Reheat as needed for quick lunches or dinners throughout the week.
What to Serve with Braised Short Ribs
This dish is rich and hearty, so you want sides that complement without overwhelming. Here are my go-to pairings:
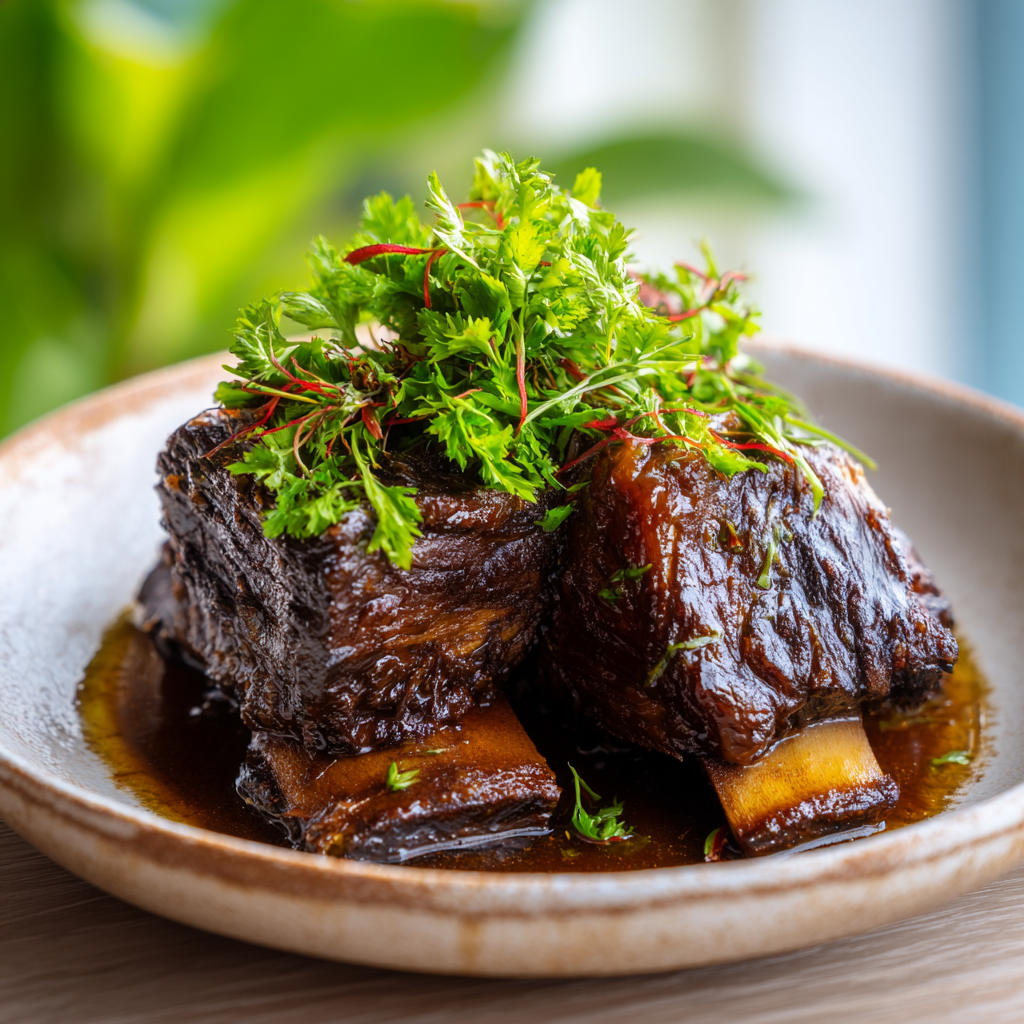
- Creamy mashed potatoes – The classic choice. The gravy soaks right in. Garlic mashed potatoes are even better.
- Mac and cheese – Because comfort food loves company. The creamy pasta balances the savory beef perfectly.
- Crusty sourdough bread – For soaking up every last drop of that rich gravy. San Francisco-style sourdough is my favorite.
- Fresh green salad – A simple salad with a bright vinaigrette cuts through the richness. Think arugula, lemon, and shaved Parmesan.
- Roasted vegetables – Asparagus, green beans, or Brussels sprouts roasted with olive oil and salt.
- Grilled corn – Since it’s summer, throw some corn on the grill. The sweetness pairs beautifully with the savory beef.
For a summer holiday table, I love serving these short ribs with a fresh tomato salad and grilled corn. It feels festive but still lets the beef shine.
Variations and Substitutions
This recipe is flexible. Here are some ways to make it your own:
- No red wine? No problem. This recipe uses beef stock as the base. If you want that wine-like depth, add a splash of balsamic vinegar along with the stock. It adds acidity and complexity without the alcohol.
- Boneless short ribs can be used instead of bone-in. Reduce the cooking time by about 30 minutes and start checking for tenderness at 2.5 hours.
- Other cuts of beef that work well: chuck roast, beef shanks, or brisket. Adjust cooking time as needed – chuck may take a bit longer, brisket about the same.
- Slow cooker method: Follow steps 1-4 on the stovetop, then transfer everything to a slow cooker. Cook on low for 6-8 hours or high for 3-4 hours.
- Instant Pot method: Sear in the Instant Pot using the sauté function. Add liquid and cook on high pressure for 45 minutes to 1 hour, then allow natural release for 15 minutes.
- Stovetop braising: After assembling everything in the pot, bring to a gentle simmer, cover, and cook on low heat for 2.5 hours. Check occasionally to make sure the liquid hasn’t evaporated too much.
- One-pot meal: Add quartered potatoes and extra carrots during the last hour of braising. They’ll cook in the flavorful liquid and become incredibly tender.
Frequently Asked Questions
I hope this recipe becomes a favorite in your kitchen like it has in mine. There’s something special about watching a tough cut of meat transform into something so incredibly tender and flavorful. And the best part? You get to be the one who made it happen.
If you try this braised beef short ribs recipe, I’d love to hear how it went. Did you serve it for a summer gathering? Did the gravy turn out perfect? Let me know in the comments how they turned out! And if you’re looking for more inspiration, check out my Pinterest board where I’m always pinning new recipes and ideas.
Ultimate Braised Beef Short Ribs with Rich Gravy
Ingredients
Method
- Preheat your oven to 325 degrees Fahrenheit.
- Heat the olive oil in a large Dutch oven or heavy-bottomed pot over medium-high heat.
- Pat the short ribs dry with paper towels. Season generously with salt and pepper, then dredge them in the flour until evenly coated. Sear the ribs for 1 to 2 minutes per side until a deep golden-brown crust forms. Transfer to a plate and set aside.
- Without cleaning the pot, add the chopped onion, sliced carrots, and celery along with a large pinch of salt and pepper. Cook, stirring occasionally, for about 6 minutes until the vegetables begin to soften.
- Reduce the heat to medium and stir in the smashed garlic, Italian seasoning, tomato paste, brown sugar, and Worcestershire sauce. Add another pinch of salt and pepper. Cook for 2 minutes, stirring frequently, until fragrant.
- Return the seared short ribs to the pot. Pour in the beef stock and add the bay leaves, plus a couple more generous pinches of salt and pepper.
- Cover the pot with a tight-fitting lid and transfer to the preheated oven. Braise for about 3 hours, or until the meat is fall-apart tender and easily shreds with a fork.
- While the ribs cook, prepare your favorite side dishes, such as creamy mashed potatoes or mac and cheese.
- Serve the shredded beef over garlic mashed potatoes, spooning some of the braising liquid as gravy. Garnish with fresh parsley and enjoy.
- If you enjoyed this recipe, please consider leaving a 5-star rating and review below.
Nutrition
Notes
Tried this recipe?
Let us know how it was!Source: Nutritional Information