
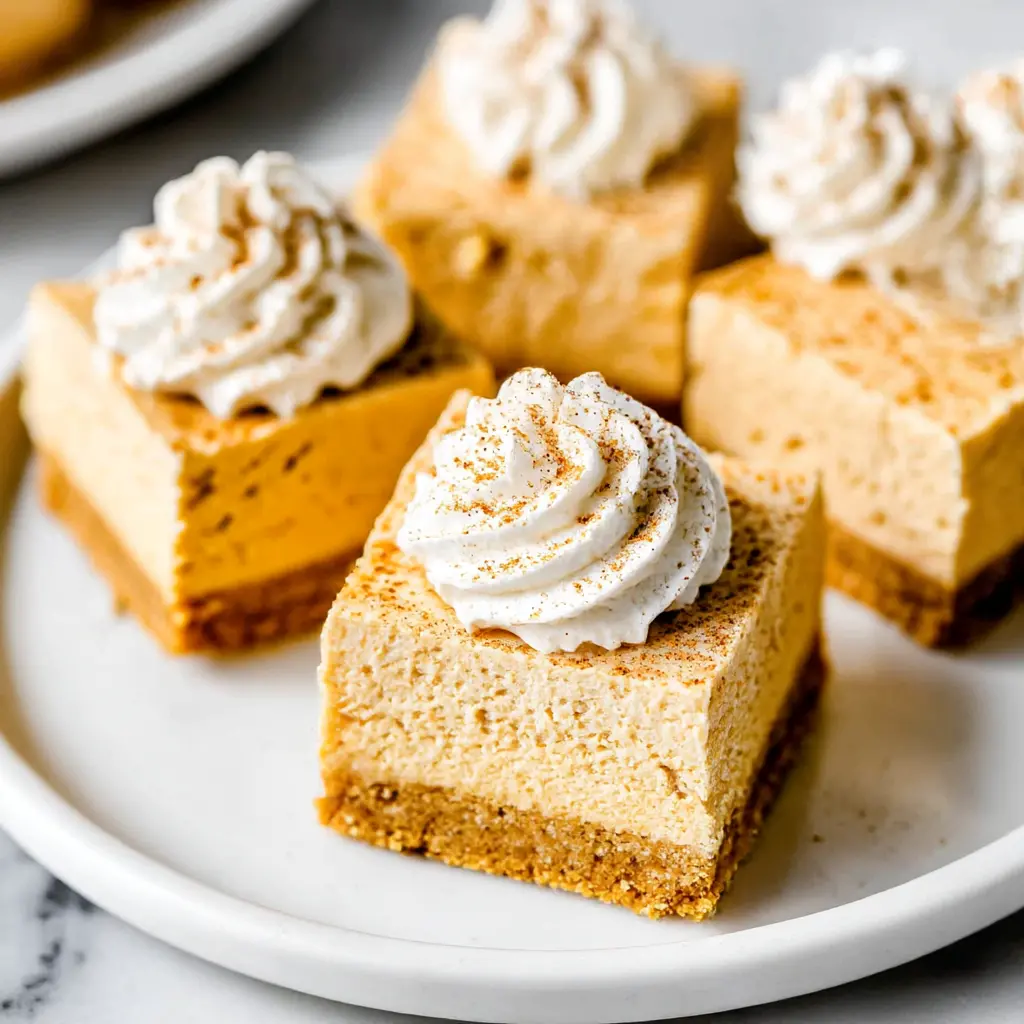
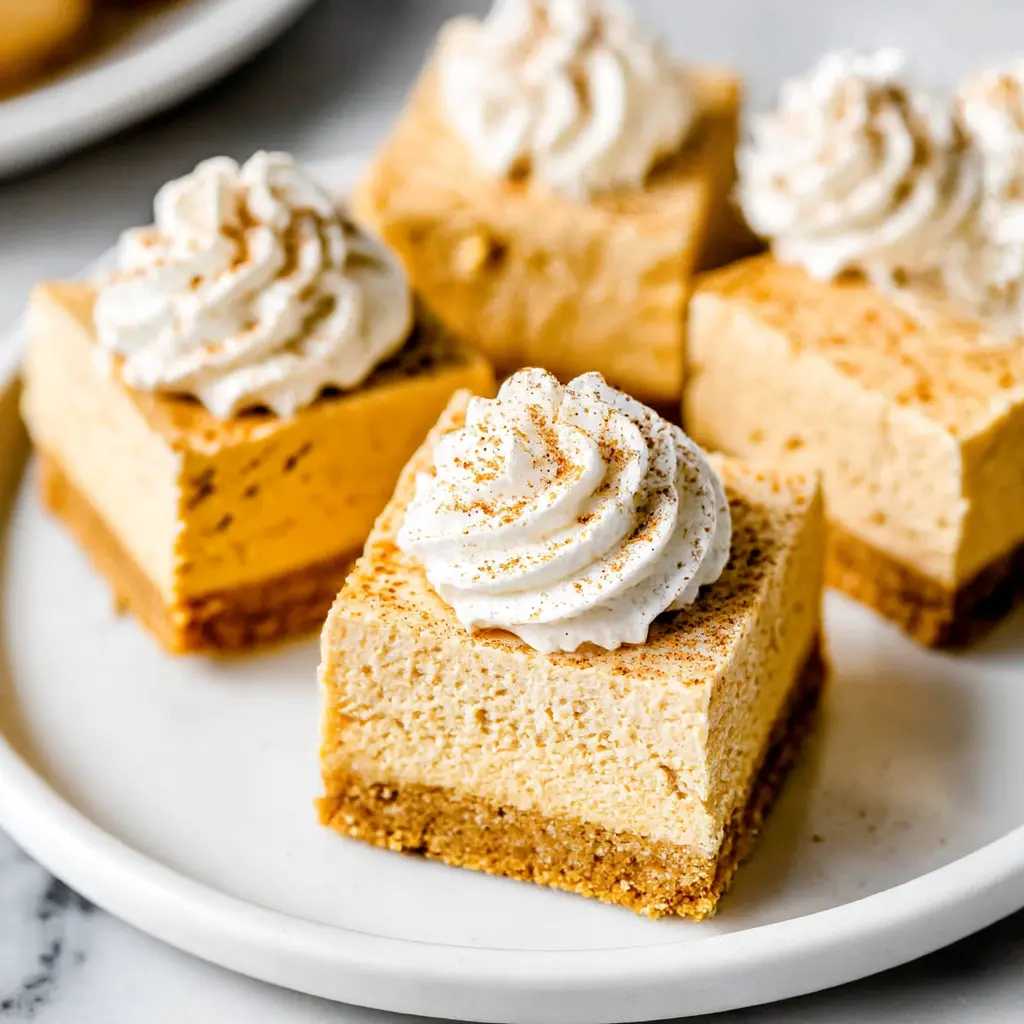
No-Bake Pumpkin Cheesecake Bars
Ingredients
Method
- Line an 8 or 9 inch square baking pan with two strips of parchment paper, crossing them so the ends overhang for easy lifting.
- In a large bowl, whisk together the graham crumbs, brown sugar, salt, and pumpkin pie spice. Add the melted butter and stir until the crumbs are evenly moistened.
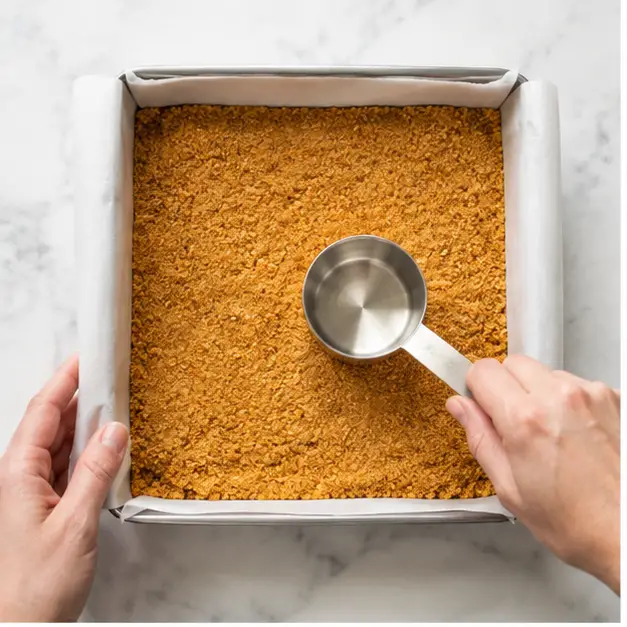
- Firmly press the crust mixture into the bottom of the prepared pan using the bottom of a measuring cup or a flat glass. Set aside while preparing the filling.
- In a chilled bowl, beat the heavy whipping cream on medium high speed until stiff peaks form. Place in the refrigerator until needed.
- In a separate bowl, beat the cream cheese, sugar, and salt until completely smooth and fluffy. Add the vanilla, lemon juice, pumpkin puree, and pumpkin pie spice; continue beating until the mixture is smooth and well combined.
- Gently fold the whipped cream into the pumpkin cheesecake mixture with a rubber spatula, turning carefully until no white streaks remain.
- Transfer the filling onto the prepared crust and smooth the top evenly. Cover the pan and refrigerate for at least 8 hours or overnight. For clean slices, transfer to the freezer for 1 hour before cutting.
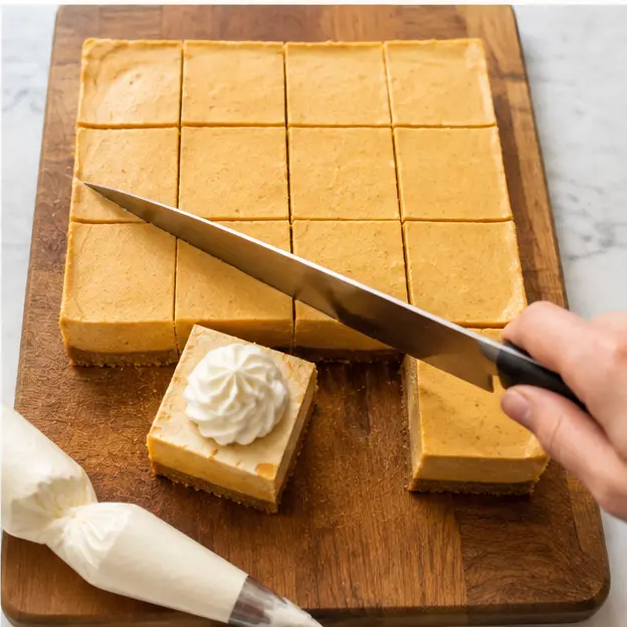
- Use the parchment handles to lift the chilled cheesecake onto a cutting board. Trim the edges if needed, then slice into 12 bars in a 4 by 3 grid, wiping the knife clean between each cut.
- In a chilled bowl, whip the heavy cream, confectioners' sugar, and vanilla to stiff peaks. Transfer to a piping bag fitted with a large star tip and pipe swirls onto each bar. Sprinkle with pumpkin pie spice and serve immediately.
Nutrition
Notes
Tried this recipe?
Let us know how it was!It’s 90 Degrees and I’m Craving Pumpkin Spice. Anyone Else?
It’s late August in California. The heat is relentless, school just started, and Labor Day weekend is staring me in the face. So why am I craving pumpkin? I can’t explain it either. When pumpkin spice season calls, I answer.
These no-bake pumpkin cheesecake bars are my solution. All the cozy fall flavor you want, none of the oven heat. You don’t need an oven for the best no-bake pumpkin cheesecake bars of your life. I said what I said.
Your kitchen stays cool, your prep time stays short, and the fridge does the rest. This is the easiest dessert you’ll make all month, I promise.
Why You’ll Love These No-Bake Pumpkin Cheesecake Bars
I’ve made a lot of cheesecake over the years, both baked and no-bake. These bars are the ones I keep coming back to. Honestly, they’re foolproof.
- No oven, no sweat. A true no-oven dessert. Your kitchen stays as cool as your iced coffee.
- 15 minutes of hands-on time. Back-to-school week calls for easy wins like this.
- Silky, creamy texture. Whipped cream folded into the filling makes every bite light and dreamy.
- A buttery graham cracker crust that actually holds together when you slice it.
- Make-ahead friendly. Chill it the night before, slice, serve. Done.
I learned the hard way that the refrigerator chill time isn’t a suggestion. My first batch? Pulled after 3 hours because I got impatient. The top looked perfect. Then I cut into it and everything slid sideways in a sad, messy heap. Trust me, let these no-bake pumpkin cheesecake bars set overnight. It’s the whole secret.
Key Ingredients That Make All the Difference
This easy cheesecake recipe keeps things simple. No gelatin, no weird stabilizers. Just real ingredients that work together beautifully.
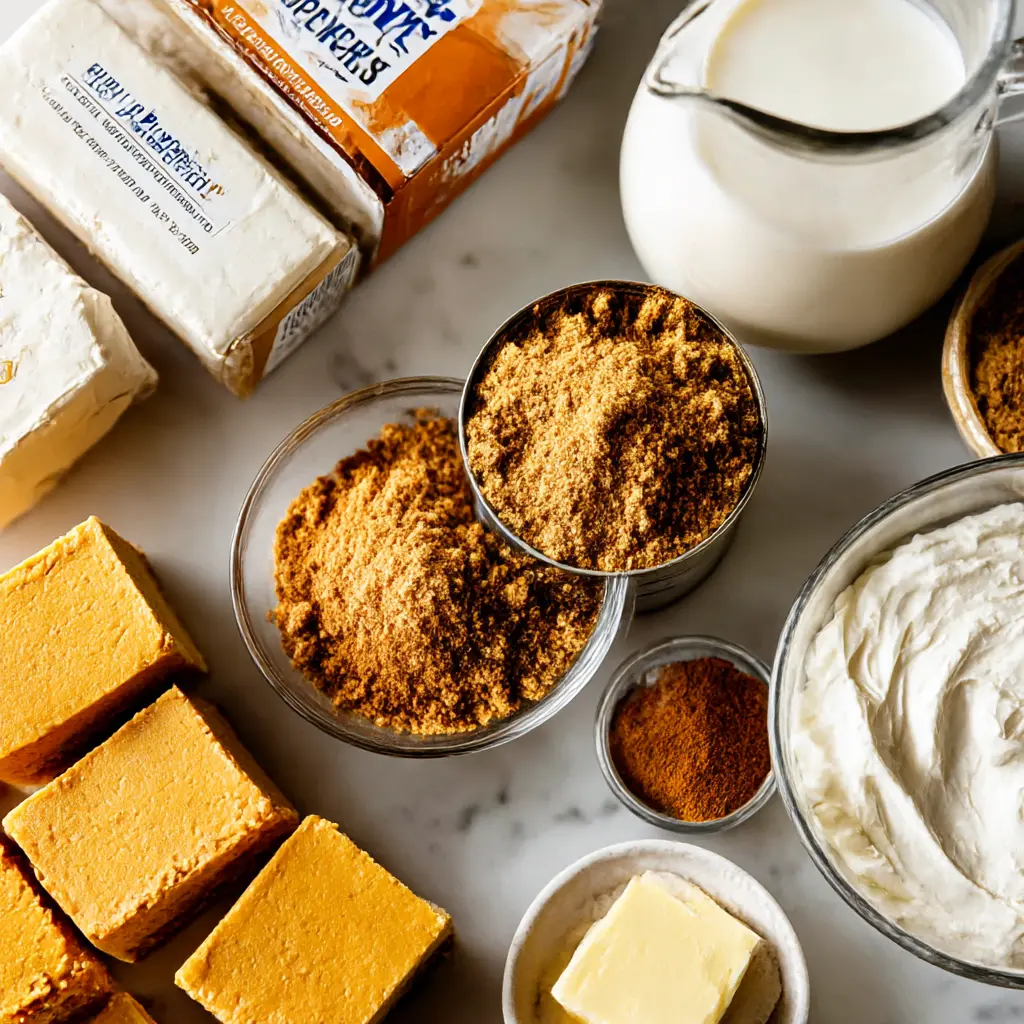
- Cream cheese, softened. Full-fat block style, not the tub. Low-fat has too much water and won’t set right. Let it sit out for an hour first.
- Heavy whipping cream. Cold, at least 35% milk fat. Whip it to stiff peaks and it gives the filling structure and lift.
- Pumpkin puree. Canned and plain. We’ll get into this below.
- Graham cracker crumbs. Fine crumbs give you a firm, buttery crust that stays put.
- Pumpkin pie spice. Cozy warmth in all three layers: crust, filling, and topping.
That teaspoon of fresh lemon juice in the filling? It brightens everything and makes the pumpkin flavor pop. Small ingredient, big difference.
What Type of Pumpkin to Use
Plain canned pumpkin puree. Every single time. Pumpkin pie filling is pre-sweetened and pre-spiced, which will throw off the balance of these no-bake pumpkin cheesecake bars completely.
Using homemade puree? Make sure it’s thick like Greek yogurt. If it’s watery, strain it through cheesecloth first. Excess moisture is the enemy of a firm, sliceable bar.
Make Your Own Pumpkin Pie Spice
Out of pumpkin pie spice? Don’t panic. It’s just a blend of warm spices: cinnamon, ginger, nutmeg, cloves, and allspice.
Whisk together 1 teaspoon ground cinnamon, 1/2 teaspoon ground ginger, 1/4 teaspoon ground nutmeg, 1/8 teaspoon ground cloves, and 1/8 teaspoon allspice. Keep it in a little jar and you’ll have it ready for the whole pumpkin spice season.
How No-Bake Cheesecake Sets Without Baking
Everyone asks me this. How does cheesecake firm up without an oven? It feels like magic, but it’s simple science.
Whipped cream does the heavy lifting. When you whip cold heavy cream to stiff peaks, you trap air in the fat. Folding that into the cream cheese filling adds structure and lightness. Then the fridge takes over.
Cold sets fat. Cream cheese firms up dramatically as it chills, and the flavors deepen overnight. Give these no-bake pumpkin cheesecake bars at least 8 hours, ideally 12, and you’ll get perfect clean slices. No oven, no water bath, no cracked tops.
How to Make No-Bake Pumpkin Cheesecake Bars
Four simple stages. Each one is easier than the last, and none of them involve turning on the oven.
Stage 1: Press the Buttery Crust
Whisk fine graham cracker crumbs with brown sugar, pumpkin pie spice, and a pinch of salt. Pour in melted unsalted butter and stir until every crumb is moistened. The brown sugar adds a deep, almost molasses-like warmth you’ll smell the second the butter hits the crumbs.
Press the mixture firmly into a parchment-lined 8×8 or 9×9 baking pan using the bottom of a measuring cup. A well-packed crust is what keeps your fall dessert bars from crumbling apart later.
Stage 2: Whip the Cream and Beat the Filling
Chill your bowl and whisk first, trust me. Whip the cold heavy cream on medium-high until stiff peaks form. In a separate bowl, beat the softened cream cheese with sugar and salt until completely smooth. No lumps allowed here, beat it like you mean it.
Add vanilla, lemon juice, pumpkin puree, and pumpkin pie spice. Beat until silky and well combined. The color alone, that gorgeous golden orange, will make you hungry.
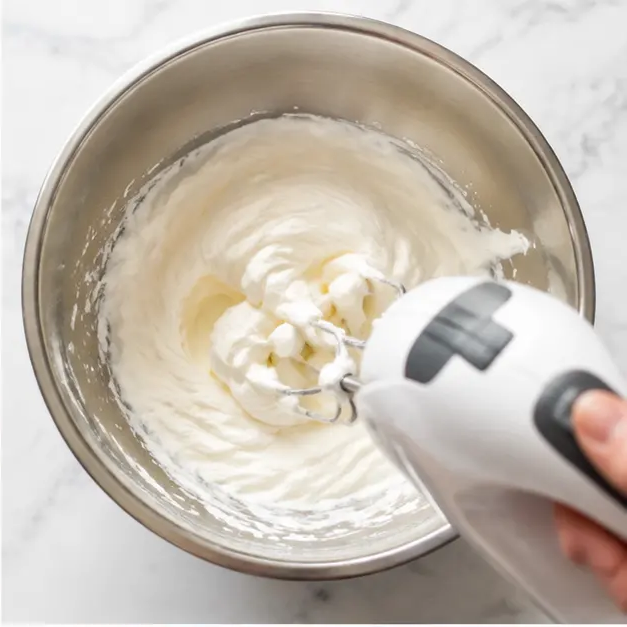
Stage 3: Fold, Spread, and Chill
Here’s where the magic happens. Gently fold the whipped cream into the pumpkin mixture with a rubber spatula. Turn slowly, scrape from the bottom, repeat. Stop when no white streaks remain. Over-folding deflates all that air, so be patient.
Spread the filling over the crust, smooth the top, cover, and refrigerate. This is the part where the fridge does the baking for you.
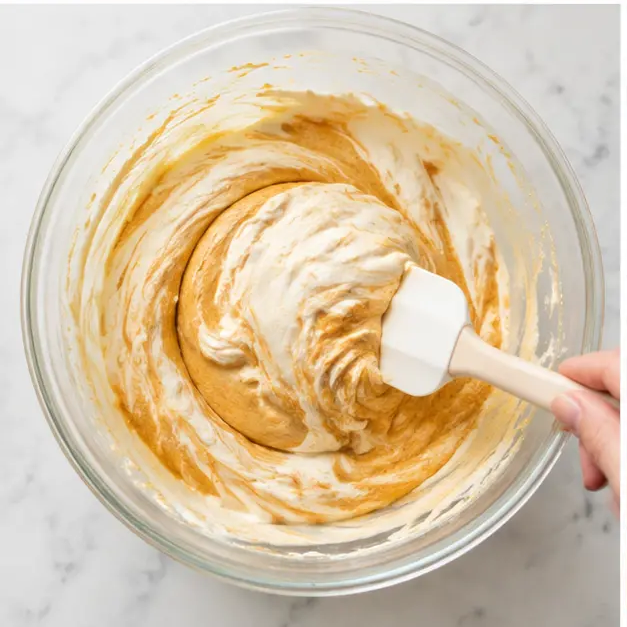
Stage 4: Slice Clean and Top with Whipped Cream
For the cleanest slices, transfer the chilled pan to the freezer for about an hour. Then use the parchment handles to lift the whole block onto a cutting board. Run your knife under hot water, dry it, and cut. Wipe the blade between every single cut. That’s the trick for bakery-style edges.
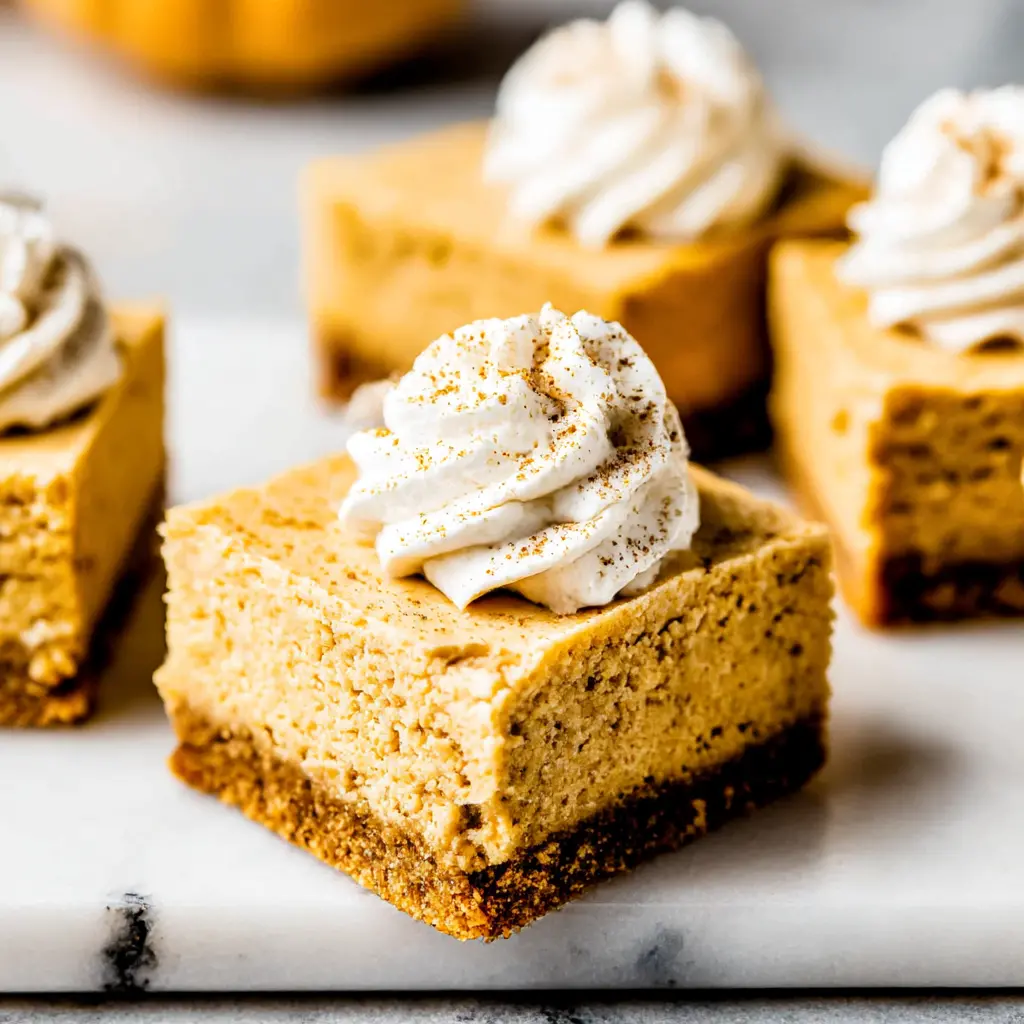
Whip the topping to stiff peaks, pipe a swirl onto each bar, and dust with pumpkin pie spice. The cut line should show clean layers: golden crust, creamy pumpkin filling, cloud of whipped topping. Cold, creamy, spiced, with that buttery crunch at the bottom. It’s the bridge between summer and fall in one bite.
No-Bake Cheesecake Tips & Variations
Once you master these no-bake pumpkin cheesecake bars, feel free to play around. The recipe is forgiving, and there’s plenty of room to make it yours.
Alcohol-Free Variation
This recipe can easily be made without alcohol. Here are the substitutions I recommend:
- Rum → pineapple juice + 1/2 tsp almond extract. For tropical sweetness
These swaps maintain the depth of flavor while keeping the dish completely alcohol-free. Perfect for family-friendly meals or personal preference.
Crust Variations
- Ginger snaps: Swap the graham crumbs for crushed ginger snaps. More spice, more warmth.
- Vanilla wafers: A sweeter, more delicate base that lets the pumpkin shine.
- Cinnamon graham crackers: An easy twist with extra cozy flavor.
Substitutions
- Cool Whip: Use 8 ounces of thawed frozen whipped topping instead of the whipped heavy cream in the filling. Fold it in gently and chill as directed.
- Store-bought graham crust: In a pinch, use a prepared crust and halve the filling ingredients.
- Dairy-free cream cheese: Works, but pick a block-style version and expect a slightly softer texture.
Common No-Bake Mistakes (and How to Fix Them)
❌ Not whipping cream to stiff peaks: The filling stays loose. Whip until the cream holds a firm peak that doesn’t droop.
❌ Using cold, lumpy cream cheese: Grainy filling. Soften it fully before beating.
❌ Skipping the chill time: Bars slide apart. Refrigerate at least 8 hours, overnight is better.
❌ Using pumpkin pie filling: Too sweet and too soft. Always use plain pumpkin puree.
❌ Slicing too soon: Freeze for an hour first, use a warm knife, wipe between cuts.
Make Ahead and Storage
These no-bake pumpkin cheesecake bars are the ultimate make-ahead dessert for Labor Day and every gathering after. Assemble the whole pan up to 3 days in advance, keep it covered in the fridge, and add the whipped cream topping right before serving.
Leftovers keep in an airtight container in the fridge for up to 4 days. They stay creamy and delicious the whole time.
Freeze the whole block, wrapped tight, and skip slicing until after it thaws. Individual bars dry out at the edges and thaw unevenly. A whole block, thawed overnight in the fridge, cuts just as cleanly as the day you made it.
A Make-Ahead Timeline That Actually Works
I’m a big believer in giving future-me a head start. Here’s how I plan these no-bake pumpkin cheesecake bars around a busy week:
- 3 days before: Make the crust and filling, assemble the pan, cover, and refrigerate.
- 2 days before: Do absolutely nothing. They’re chillin’. Literally.
- 1 day before: Whip up the topping, spoon it into a piping bag, and stash it in the fridge. It holds just fine.
- Day of: Slice, top, dust with pumpkin pie spice, and serve to your very impressed crowd.
Your No-Bake Pumpkin Cheesecake Bar Questions, Answered
I’ve been making these bars for years, so I’ve heard just about every question there is. Let me save you the trial and error.
Can I Use Cool Whip Instead of Heavy Cream?
Yes, and it’s the one shortcut in this recipe I actually approve of. Use 8 ounces of thawed frozen whipped topping in place of the whipped cream in the filling. Fold it in gently, exactly like you would the whipped cream, and trim the sugar in the filling a bit since Cool Whip brings its own sweetness. The texture lands slightly softer, but it still slices beautifully.
Why Is My Filling Runny?
Let me count the usual suspects: your cream wasn’t whipped to stiff peaks, your cream cheese was low-fat, your pumpkin puree was watery, or you cut into the bars before they were fully chilled. Fix all four and your filling will hold like a dream.
Can I Use Low-Fat Cream Cheese?
I’ve tested it so you don’t have to. Low-fat cream cheese holds more water, and water is the enemy of a set no-bake filling. Use full-fat block style. If you’re determined, block-style Neufchâtel works in a pinch. Skip anything that comes in a tub.
Can I Make These Gluten-Free?
Easily. Swap the graham cracker crumbs for gluten-free graham crackers or crushed gluten-free vanilla wafers, and the rest of the recipe is already gluten-free. Same buttery crust, same cozy flavor, no one will know the difference.
Can I Make These Dairy-Free?
Honestly? It’s tough. Block-style dairy-free cream cheese plus a coconut-based whipped cream gets you closest, but the bars won’t set as firmly. If you’re baking for a dairy-free friend, I’d point you toward a different dessert. These bars are worth the dairy.
Can I Use Fresh Pumpkin Instead of Canned?
You can, but fresh pumpkin holds more water than canned. Roast it, puree it, then strain it through cheesecloth until it’s as thick as Greek yogurt. If it’s the least bit watery, your bars won’t set properly.
How Long Can These Bars Sit Out?
About 2 hours at room temperature is the safe window. After that, back to the fridge they go. These bars are a cold dessert, through and through.
How to Scale This Recipe for a 9×13 Pan
Need a bigger batch for Thanksgiving or a party? I got you.
The recipe as written fills an 8×8 or 9×9 pan, which gives you 9 to 12 generous bars. If you need to feed a crowd, grab a 9×13 pan and double every ingredient, including the crust. Press the crust a little thinner across the larger pan, and extend the chill time to a full 12 hours so the thicker filling sets completely.
One note: if you double the filling, let your arm catch a break. Use a stand mixer for the cream cheese mixture and a separate bowl and whisk for the cream.
More Pumpkin Recipes for the Obsessed
If you’re anything like me, one pumpkin dessert is never enough. Once the leaves start turning, I’m practically living off fall recipes. A few favorites I rotate all season:
- Pumpkin Bread: The one with the crackly cinnamon-sugar top that disappears before lunch.
- Pumpkin Chocolate Chip Cookies: Soft, cakey, and dangerously easy to eat by the handful.
- Pumpkin Soup: For the savory side of your pumpkin obsession. Creamy, silky, and perfect with a grilled cheese on a rainy day.
Tell me in the comments: are you a pumpkin spice person or a pumpkin puree purist? And if you make these bars, come back and let me know how they turned out. I read every single comment, and I’m genuinely rooting for your dessert table.
Expert Notes & Data Insights
I’m the kind of person who takes notes while testing recipes. Spreadsheets, tasting logs, the works. So here are the nerdy but genuinely useful insights I’ve gathered from making these no-bake pumpkin cheesecake bars more times than I can count.
- Stiff peaks are the single most important step. In my testing, filling made with soft-peak cream came out noticeably looser even after a full overnight chill. Whip until the cream holds a firm peak that stands straight up. No drooping allowed.
- Full-fat cream cheese outperforms low-fat every single time. Low-fat varieties carry more water, and that extra water interferes with the setting process. In side-by-side batches, the low-fat version stayed soft in the center and never reached that clean, sliceable firmness.
- Chill time directly predicts slice quality. Four to six hours gives you a soft, scoopable bar. Eight hours gets you there. Twelve hours or more delivers those crisp, bakery-style edges we’re all chasing. The longer the chill, the better the bite. Full stop.
- The freezer trick is worth every minute. That one-hour freeze before slicing gave me dramatically cleaner edges in testing. Pair it with a warm knife and wiping between cuts, and you’ll get professional-looking bars at home.
- Pumpkin puree brands vary more than you’d expect. Some are thicker than others. If your puree leaves a wet trail when you stir it, blot it with paper towels before folding it in. It makes a real difference in how firmly the bars set.
At the end of the day, these bars are about one thing: giving you a great dessert without breaking a sweat. No oven, no stress, no complicated techniques. Just creamy pumpkin, warm spices, and a buttery crust that makes everyone ask for the recipe.
Make them for Labor Day. Make them for Thanksgiving. Make them on a random Tuesday because you deserve it. I’ll be right here, doing the same.

2 Responses
Just made these for a family gathering and they were a hit! The pumpkin spice flavor is perfect and the texture is so creamy. I love that there’s no baking involved, especially with this heat.
These are amazing! I swapped the graham crackers for ginger snaps and added extra cinnamon. Best fall dessert I’ve made this year!