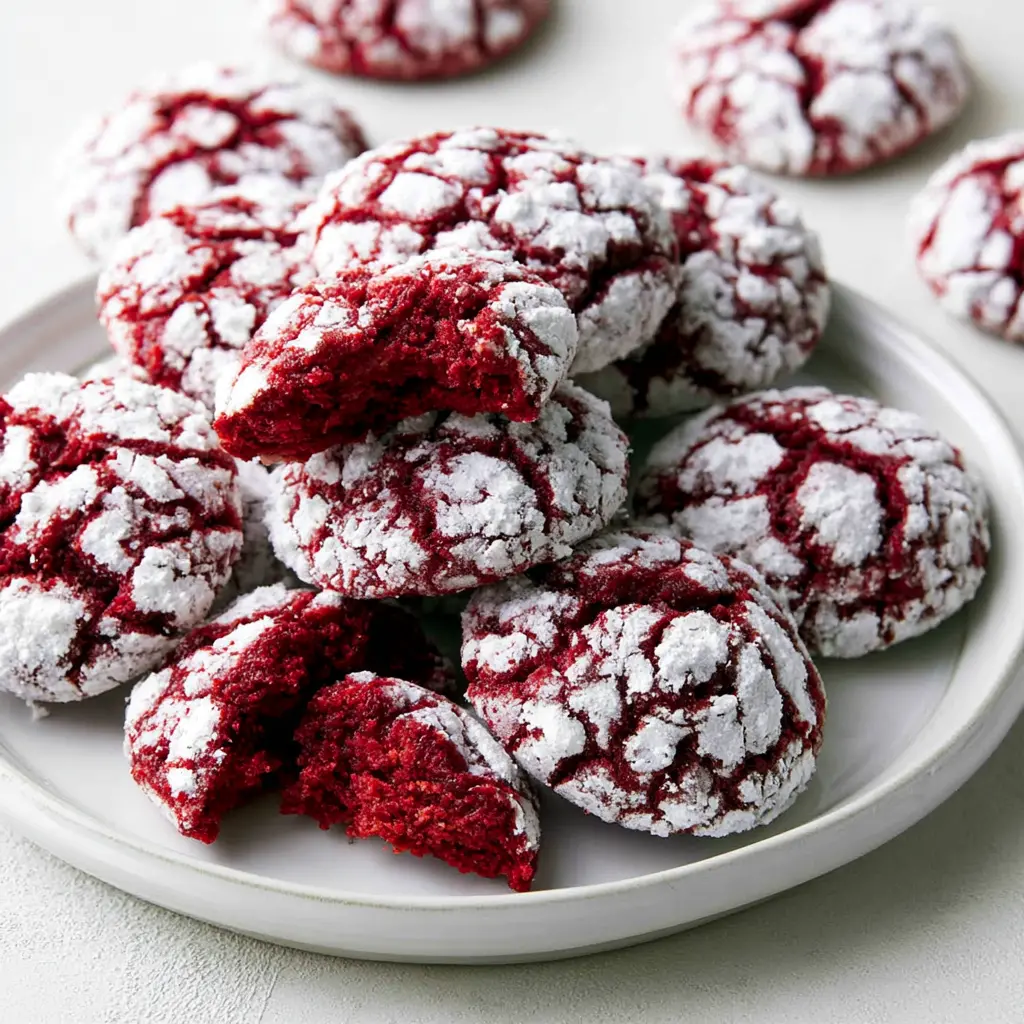
Why You’ll Love These Red Velvet Crinkle Cookies
You know those cookies in the bakery case that stop you mid-step? The deep red ones dusted in snow-white powdered sugar, cracked on top like a riverbed after a long dry spell? I used to treat those crinkle cookies like bakery magic, something only professionals with big ovens and fancy pastry training could pull off.
Then I learned the trick. And bless your heart, it’s almost embarrassingly simple. You probably have every single ingredient in your kitchen right now.
These red velvet crinkle cookies start with a box of cake mix. Four ingredients total. Fifteen minutes from bowl to oven. Soft, fudgy centers with that classic tangy cocoa flavor, plus those gorgeous crackled tops that make people say “Wait, YOU made these?!”
Labor Day is three days out, which means the last big potluck of summer. You need a dessert that travels well, feeds a crowd, and vanishes in minutes. These crinkle cookies are exactly that. They pack like a dream, they don’t need refrigeration, and they disappear faster than the potato salad.
Here’s why this recipe works:
- Just 4 ingredients: red velvet cake mix, eggs, butter, and powdered sugar. Nothing exotic, nothing fussy.
- 15 minutes total: 5 minutes of stirring, 10 minutes in the oven.
- Soft and chewy: not cakey, not dry. The centers stay fudgy, exactly how crinkle cookies should be.
- Bakery looks: that crackle effect looks like you fussed for hours, when really you spent fifteen minutes and one bowl.
If you’ve ever made chocolate chip cookies, you can absolutely make these. I promise.
Ingredients You’ll Need
Let’s talk about what goes into these crinkle cookies, because the list is short and every item earns its place. No wandering through eight aisles at the grocery store.
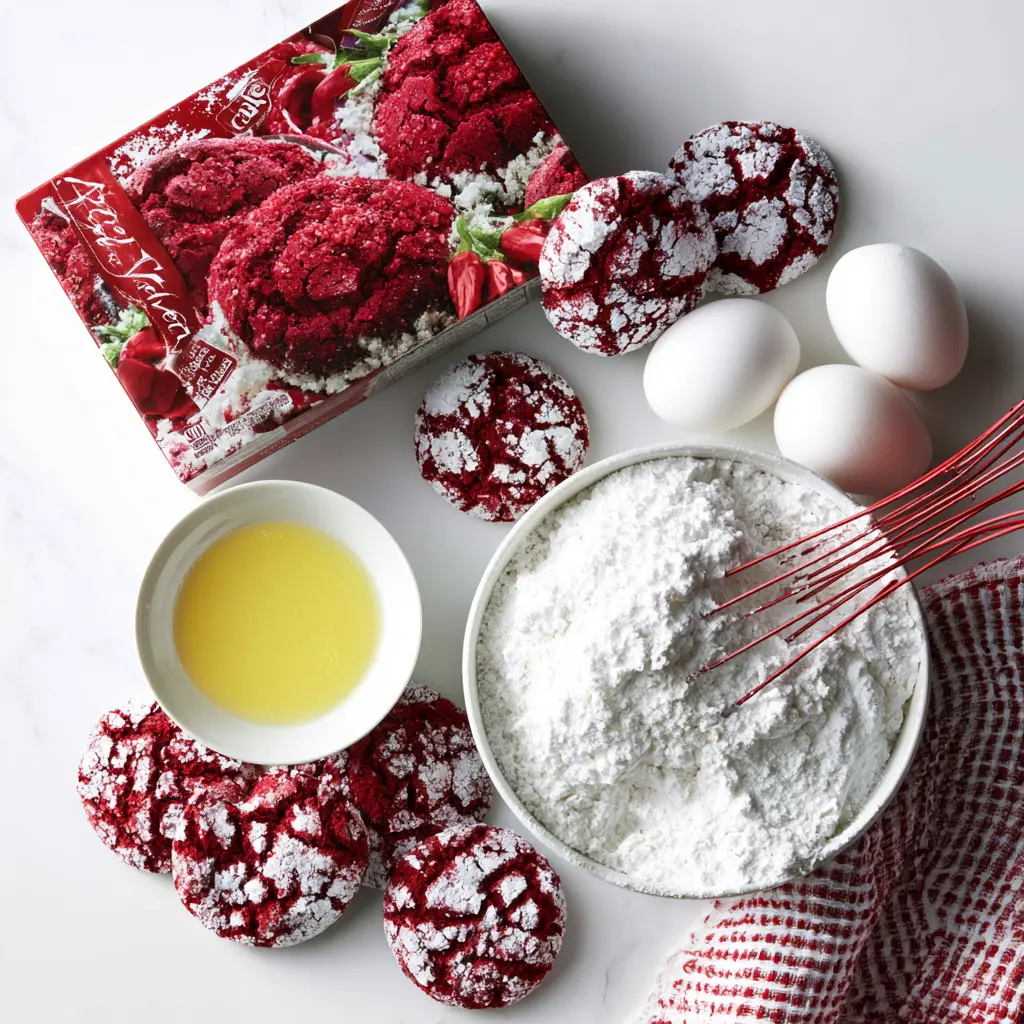
Red velvet cake mix (1 box): This is your shortcut, and it’s a good one. The mix already has the cocoa powder, the leavening, the sugar, and that signature red color built right in. Look for a box with pudding in the mix if you want thicker, taller cookies. The standard 18-ounce box is what this recipe is built on. I’ve seen folks ask about the 15-ounce boxes, so here’s the straight answer: they’re too small. The dough won’t come together properly. Stick with 18 ounces and you’ll be just fine.
Eggs (2 large): They bind everything together and give the cookies structure. Room temperature eggs blend a little more smoothly, but straight from the fridge works fine here since the butter is melted anyway. You don’t need room temperature butter for this one, melted is even easier.
Butter, melted (1/3 cup): Unsalted or salted, whichever you prefer. I use salted because that’s what’s sitting on my counter, and these cookies turn out delicious every single time. The butter adds richness and helps the dough come together into a soft, workable ball.
Powdered sugar (1/2 cup): The star of the show, no question. This powdered sugar coating is what creates that snowy crackle as the cookies bake. You’ll use it for rolling, and you might want a little extra on hand. Half a cup is usually plenty, but more is always welcome when you’re in the middle of a sugar snowstorm.
That’s it. No red food coloring gel to wrestle with, no buttermilk to measure, no baking soda and vinegar chemistry experiment. The cake mix handles all of that for you. For a festive dessert that looks like you slaved away for hours, it’s almost unfair.
How to Make Red Velvet Crinkle Cookies
Making crinkle cookies from scratch can be a real project. This version? It’s a four-stage process, and none of it is hard. Let me walk you through it like we’re standing at my kitchen counter in Charleston. (You’d be welcome, by the way. Samuel would put on coffee.)
Stage 1: Make the dough. Preheat your oven to 350 degrees F and line a baking sheet with parchment paper. In a large mixing bowl, stir together the red velvet cake mix, eggs, and melted butter until a soft dough forms. It will look a little sticky and glossy. That’s exactly right. Do not panic when it seems soft. The cake mix absorbs the moisture as it sits, and the dough firms up quickly.
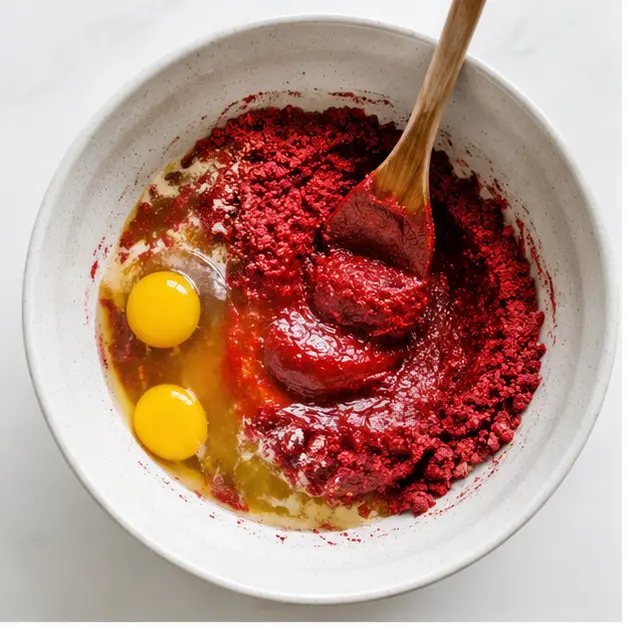
Stage 2: Roll the dough balls. Scoop out portions of the dough and roll each one into a ball. A cookie scoop makes this tidy, but your hands work just as well. The dough will want to stick to your fingers, so keep a little powdered sugar on your hands if needed. The red color does stain, so work quickly or wear gloves. I’ve been known to look like I lost a fight with a beet.
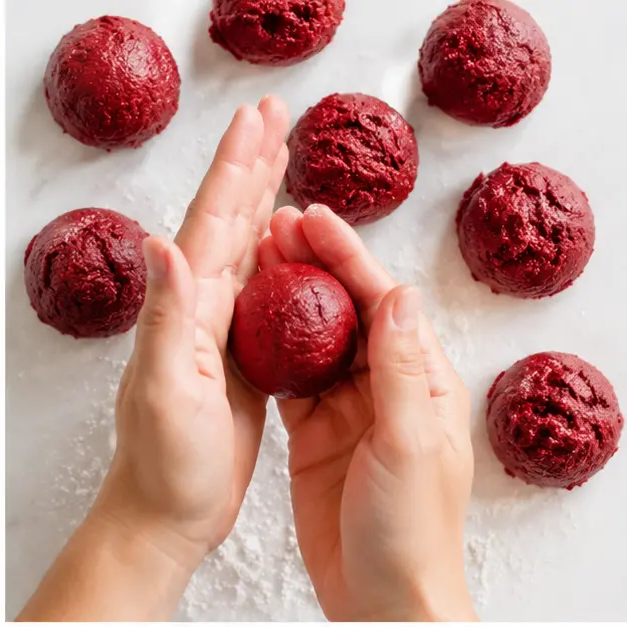
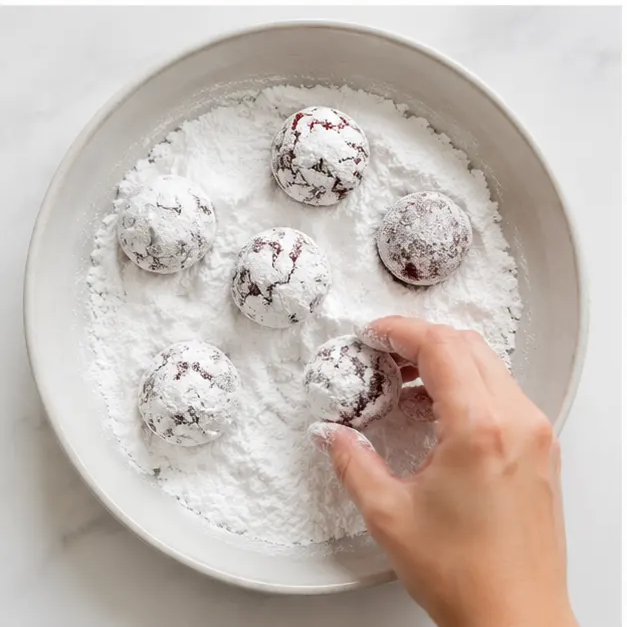
Stage 3: Coat in powdered sugar. This is the fun part, and it’s the secret to the whole thing. Roll each dough ball generously in powdered sugar until it’s completely white, like a snowball. Get every single side. Don’t be shy. That thick coating is what cracks open in the oven and creates the crisscross pattern of white against red. The trick to gorgeous crackle effect cookies is a generous hand with the sugar. These are the crinkle cookies you see in bakery cases, and the coating is exactly how they get that look.
Stage 4: Bake. Arrange the coated dough balls on your prepared baking sheet, spacing them about 2 inches apart. Bake for 10 minutes. Here’s the important part: don’t overbake. The cookies may look slightly underdone in the center when you pull them out. That’s correct. They’ll set as they cool on the sheet. Let them rest a few minutes before moving to a wire rack.
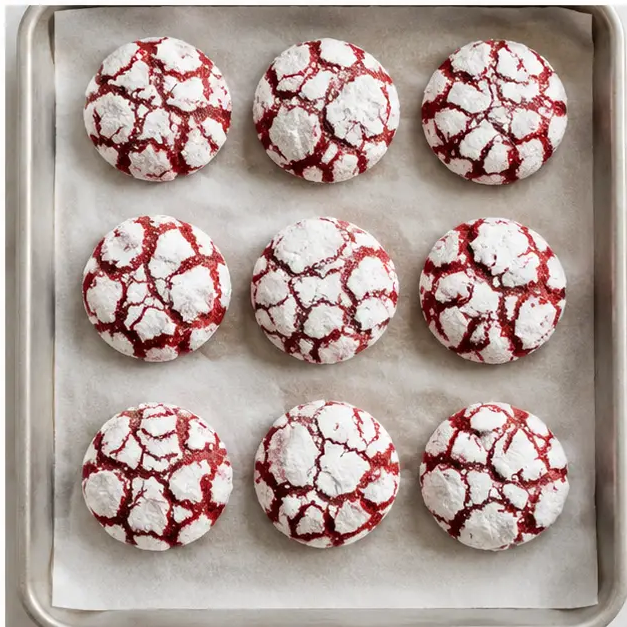
And that’s it. Within minutes of hitting the oven, those white cracks bloom across the red surface. You’ll hear a faint crackle from inside the oven, a little song only bakers get to hear. The kitchen will smell warm and sweet, like vanilla and cocoa. You’ll watch the transformation through the oven door, and I won’t blame you for standing there staring. I still do, every single batch.
Tips for the Perfect Crinkle
Over the years I’ve made a lot of crinkle cookies, and I’ve learned a few things the hard way so you don’t have to. What is the secret to crinkle cookies, really? It’s not fancy technique. It’s a thick powdered sugar coat and the right bake time. That’s the whole secret. But let me go a little deeper.
The powdered sugar sinks into the cracks. What most people don’t know is that the powdered sugar doesn’t just sit on top of the cookie. As the dough spreads and cracks in the oven, the sugar absorbs INTO those expanding cracks. That absorption is what creates the crinkle look. Roll lightly and you get a faint dusting. Roll generously and you get drama. This recipe loves drama.
Don’t overbake, ever. Ten minutes at 350 degrees F is the sweet spot. Every oven runs a little different though, so start checking at the 9-minute mark. An oven thermometer is a good friend here if you suspect your oven lies to you. The cookies should look set at the edges but still soft in the middle. They’ll firm up as they cool. Overbaked crinkle cookies turn dry and hard, and that’s a crying shame.
Keep them soft after baking. Store cookies in a zip-top bag at room temperature. If you leave them uncovered on the counter, they’ll harden up. That’s just the nature of these cookies, so be kind to them and zip them up.
Use a light-colored baking sheet. Dark pans absorb more heat and can cause cookies to spread too much. A lightweight, light-colored sheet lined with parchment paper gives you the most consistent results. And let the sheet cool completely between batches. If you load a second batch onto a hot pan, the dough starts melting before it even hits the oven.
Common mistakes I’ve seen, and made myself:
- ❌ Flat cookies with no cracks: Usually the dough was too warm or the pan was too hot. Let the sheet cool between batches. If your kitchen is sweltering, give the dough balls a quick rest in the fridge for 15 minutes.
- ❌ Dry, crumbly cookies: You baked them a minute or two too long. Pull them while the centers still look slightly soft and underdone.
- ❌ Powdered sugar vanished: The dough wasn’t coated thickly enough, or the cookies baked too long. Roll generously, bake on time, and the sugar will do its job.
- ❌ Dough too sticky to handle: It’s supposed to be soft. That’s the nature of this dough. If it’s truly unworkable, pop the bowl in the fridge for 20 to 30 minutes. Cold dough is cooperative dough.
And here’s a trick from my test kitchen: as soon as the cookies come out of the oven, gently scoot any that spread unevenly back into round shapes with a spoon. They’re still soft enough to nudge for the first minute or two. It’s a little thing, but it makes the tray look like a bakery display.
Speaking of hot weather, this dough actually loves the fridge. On a hot August afternoon when your kitchen feels like a sauna, an extra chill before baking means less spread and a better crackle. The heat works in your favor if you let it. Dough chilling is a wonderful tool, whether it’s baking day or make-ahead day.
Variations and Add-Ins
The base recipe is perfect as-is, but crinkle cookies are friendly to a little tinkering. Here are some optional ways to make them your own. Remember, everything in this list is an addition, not part of the four-ingredient base:
- White chocolate chips: Fold a cup into the dough for extra sweetness. They look beautiful against the red crumb.
- Extra cocoa powder: Stir in a few tablespoons of unsweetened cocoa for a deeper, darker chocolate flavor.
- A drop of vanilla extract: A teaspoon stirred into the dough adds warmth and depth.
- Chocolate fudge cake mix: Swap it for red velvet to make classic chocolate crinkle cookies. Same method, different flavor, equally gorgeous.
- Cream cheese glaze: Some folks like a thin drizzle over the cooled cookies. It’s not part of the base recipe, but it’s a lovely optional finish for special occasions.
- Mint extract: A drop or two makes these taste like a peppermint bark cookie. Lovely for December.
Any add-in is optional. The four-ingredient version is a beautiful thing all on its own. (My grandbaby Ruth says I should never leave well enough alone, but she also eats the plain ones first, so I don’t take her advice on this.)
These red velvet cake cookies also shine at specific celebrations. They’re a natural Christmas cookie recipe addition to any holiday tray, and they make darling Valentine’s Day cookies if you want to skip the box of chocolates this year. For cookie exchange season, you can’t go wrong: they travel well, keep for days, and stand out on the table like little jewels.
And save this thought for October: red velvet’s deep crimson color pivots beautifully to vampire crinkle cookies for Halloween. A little tweak, a lot of fun, and it’s closer than you think once Labor Day passes.
How to Store Red Velvet Crinkle Cookies
These crinkle cookies are made for sharing, and they store surprisingly well. Here’s the full rundown, from the counter to the freezer:
Room temperature: Store baked cookies in a zip-top bag or airtight container at room temperature for up to 4 days. If you stack them, layer parchment or waxed paper between layers so the powdered sugar doesn’t smear off and the cookies don’t stick together. These crinkle cookies stay soft for days when stored this way.
Make-ahead dough: You can prepare the dough and refrigerate it for up to 24 hours before baking. The flavor actually deepens a little overnight, the way stew gets better on day two. When you’re ready to bake, roll and coat as directed. This dough chilling step is completely optional, but it’s handy when you want to break the work into two days.
Freeze the dough: Roll the dough into balls, skip the powdered sugar coating, and freeze them on a baking sheet for an hour. Transfer to an airtight container and freeze for up to 2 months. When the craving hits, thaw about 30 minutes, roll in powdered sugar, and bake. Frozen cookie dough balls are a gift to your future self on a busy weeknight.
Freeze baked cookies: Cool completely, freeze flat on a baking sheet, then layer in an airtight container with parchment between layers. They’ll keep for up to a month. Thaw at room temperature for about 30 minutes before serving.
Travel tip: These are excellent potluck cookies. They pack well in a sturdy container with parchment between layers and don’t need refrigeration. Bring them to the Labor Day cookout and watch them disappear. That’s the mark of a truly great festive dessert: it brings people together and leaves empty plates behind.
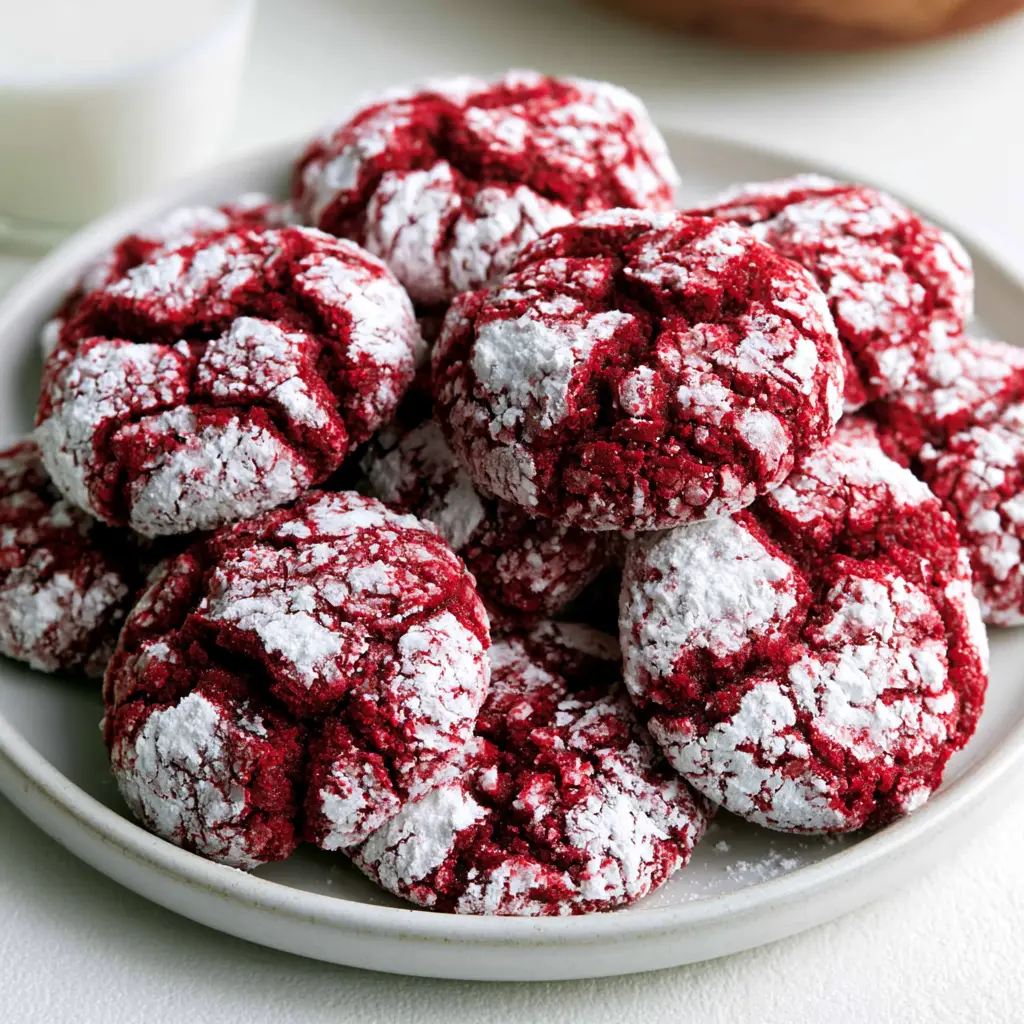
Your Bakery-Case Moment Is Coming
When you pull that tray from the oven and see the white cracks spread across the deep red surface, you’ll feel like a professional. The powdered sugar snowstorm that dusts your kitchen, your apron, and maybe your hair is part of the charm. Wear it like a badge.
When you bring these to the Labor Day table, don’t be surprised if the plate comes back empty. That’s the kind of cookie these are. People will ask for the recipe, and when you tell them it’s four ingredients and fifteen minutes, they won’t believe you. Let them wonder.
Serve these crinkle cookies with a cold glass of milk or your favorite holiday coffee. Share them with the folks you love. And if you make a batch, I’d love to see your crackle. Come pin these red velvet crinkle cookies to your Pinterest baking board so they’re waiting for you next time you need a little bakery magic at home.
Your bakery-case moment is one bowl, one bake, and one generous roll in powdered sugar away. And when you’re ready to make it happen, everything you need is right here.
Red Velvet Crinkle Cookies Recipe Card
Here’s the whole recipe in one tidy place save it, screenshot it, pin it to your board. You’ll be glad it’s handy when the craving strikes.
Ingredients
- 1 box (18 ounces) red velvet cake mix
- 2 large eggs
- 1/3 cup butter, melted
- 1/2 cup powdered sugar, for rolling
Instructions
- Preheat your oven to 350 degrees F and line a baking sheet with parchment paper.
- In a large mixing bowl, stir together the cake mix, eggs, and melted butter until a soft dough forms.
- Scoop the dough into 1.5-tablespoon portions and roll each into a ball.
- Roll each dough ball generously in powdered sugar until it’s completely covered, like a snowball.
- Place the coated dough balls 2 inches apart on the prepared baking sheet.
- Bake for 10 minutes, until the edges are set but the centers still look slightly soft.
- Let the cookies rest on the baking sheet for 5 minutes, then transfer to a wire rack to cool completely.
Tools You’ll Want Nearby
- Large mixing bowl and a sturdy spoon
- Baking sheet lined with parchment paper
- A cookie scoop, if you have one (your hands work great too)
- Wire cooling rack
Recipe Notes
- Yield: about 18 cookies
- Storage: airtight container at room temperature up to 4 days
- Freeze: unbaked dough balls up to 2 months; baked cookies up to 1 month
Frequently Asked Questions
Over the years, folks have asked me just about everything when it comes to crinkle cookies. Here are the answers to the questions that come up most often.
How long do these cookies stay fresh?
Keep them in an airtight container or zip-top bag at room temperature and they’ll stay soft for up to 4 days. Layer them with parchment or waxed paper so the powdered sugar doesn’t rub off and the cookies don’t stick together. Not that they’ll last that long, if I know anything about cookies and crowds.
Can I freeze the dough?
Yes, and it’s a wonderful gift to your future self. Roll the dough into balls, skip the powdered sugar coating, and freeze them on a baking sheet for about an hour. Transfer to an airtight container and they’ll keep for up to 2 months. When the craving hits, thaw for 30 minutes, roll in powdered sugar, and bake.
Why did my cookies turn out flat?
Flat cookies are almost always a temperature problem. If the dough is too warm, the butter melts before the cookies can set, and everything spreads into thin pancakes. If your kitchen is warm or your first batch went sideways, pop the dough balls in the fridge for 15 to 30 minutes before baking. And make sure your baking sheet has cooled completely between batches a hot pan starts melting the dough before the cookies even hit the oven.
Why didn’t my cookies crinkle?
Almost always, it’s one of two things: not enough powdered sugar on the dough, or overbaking. The crinkle happens because that thick white coating absorbs into the dough as it spreads and cracks in the oven. A shy coating means a shy crackle. And if the cookies bake too long, they firm up before the sugar can do its work. Roll generously, bake for 10 minutes, and the crackle will come.
Do I really need the 18-ounce box of cake mix?
Yes. This is the one place the recipe won’t bend. The 15-ounce boxes are too small the dough won’t come together properly and you’ll be left with a crumbly mess. If you already bought the small box, you can add a few tablespoons of mix from another box to make up the difference, or just save it for another baking day.
Should I roll the dough in granulated sugar before the powdered sugar?
Some bakers like a double coat: a light roll in granulated sugar first, then the powdered sugar on top. The granulated sugar acts as a little barrier that keeps the powdered sugar from melting into the dough, which can make the crinkle even more dramatic. This recipe works beautifully with just the powdered sugar, but if you want extra drama, give the double dip a try.
Can I make the dough the night before?
Absolutely. Mix up the dough, cover the bowl, and pop it in the fridge overnight. Cold dough is actually easier to roll, and the flavor deepens just a little, the way leftover chili tastes better on day two. When you’re ready, roll, coat, and bake as directed.
Salted or unsalted butter?
Either one works beautifully. I use salted because that’s what lives on my counter, and these cookies turn out perfect every single time. The cake mix carries plenty of flavor, so the butter is really just here for richness.
How do I reheat these cookies?
If you’re lucky enough to have leftovers, a few seconds in the microwave will make them soft and warm like they just came out of the oven. For a slightly firmer texture, warm them in a 300-degree oven for about 5 minutes. Either way, a fresh dusting of powdered sugar on top never hurts.
Expert Notes & Data Insights
Since I’ve made more batches of these cookies than I can count, let me share a few things the kitchen has taught me the kind of notes you won’t find on a recipe card.
The 10-minute mark is the whole game. At 350 degrees, the edges of these cookies set right around the 8-minute mark. At minute 10, the centers are at that soft, fudgy sweet spot, and the powdered sugar has finished its crackling work. Pull them then, even if they look slightly underdone in the middle. The carryover heat finishes the job as they cool on the sheet. Every oven has its own personality, so start checking at 9 minutes, and consider an oven thermometer if you two don’t always see eye to eye.
The powdered sugar is doing real work. It’s easy to think of it as just a pretty coating, but it’s the whole mechanism behind the crinkle. As the dough spreads and the surface cracks, the sugar absorbs into those fresh cracks, pulling a little moisture from the dough as it goes. That contrast white veins against the deep red crumb is the cookie equivalent of a signature. Skip the generous coating and you get a plain red cookie. Roll thick, and you get art.
Cold dough is cooperative dough. This is the data point I come back to again and again. Chilling the dough firms up the butter, and firm butter spreads slowly and evenly in the oven. That means taller cookies, and taller cookies crack more dramatically. If your kitchen is warm, or your first batch spread too much, 15 minutes in the fridge makes a measurable difference in how these turn out.
One box size, no exceptions. I tested the smaller cake mix boxes so you don’t have to, and the 18-ounce box is non-negotiable. That extra three ounces is what gives the dough the right ratio of dry to wet. Without it, the dough never fully comes together. Consider this your official warning from someone who has cleaned up the crumbly evidence.
And one more number from my kitchen: a 1.5-tablespoon scoop makes cookies that feel generous but never guilty. That portion size is what disappears fastest at a potluck, and I’ve got the empty plates to prove it.
At the end of the day, this recipe is about joy. The quiet crackle from inside the oven. The powdered sugar dusting your apron, your counter, and somehow your forehead. The way people’s eyes light up when you set the plate down. The numbers help me teach it, but that moment that’s the whole point.
Happy baking, y’all. I’ll be in the kitchen with a glass of milk, saving you a cookie.