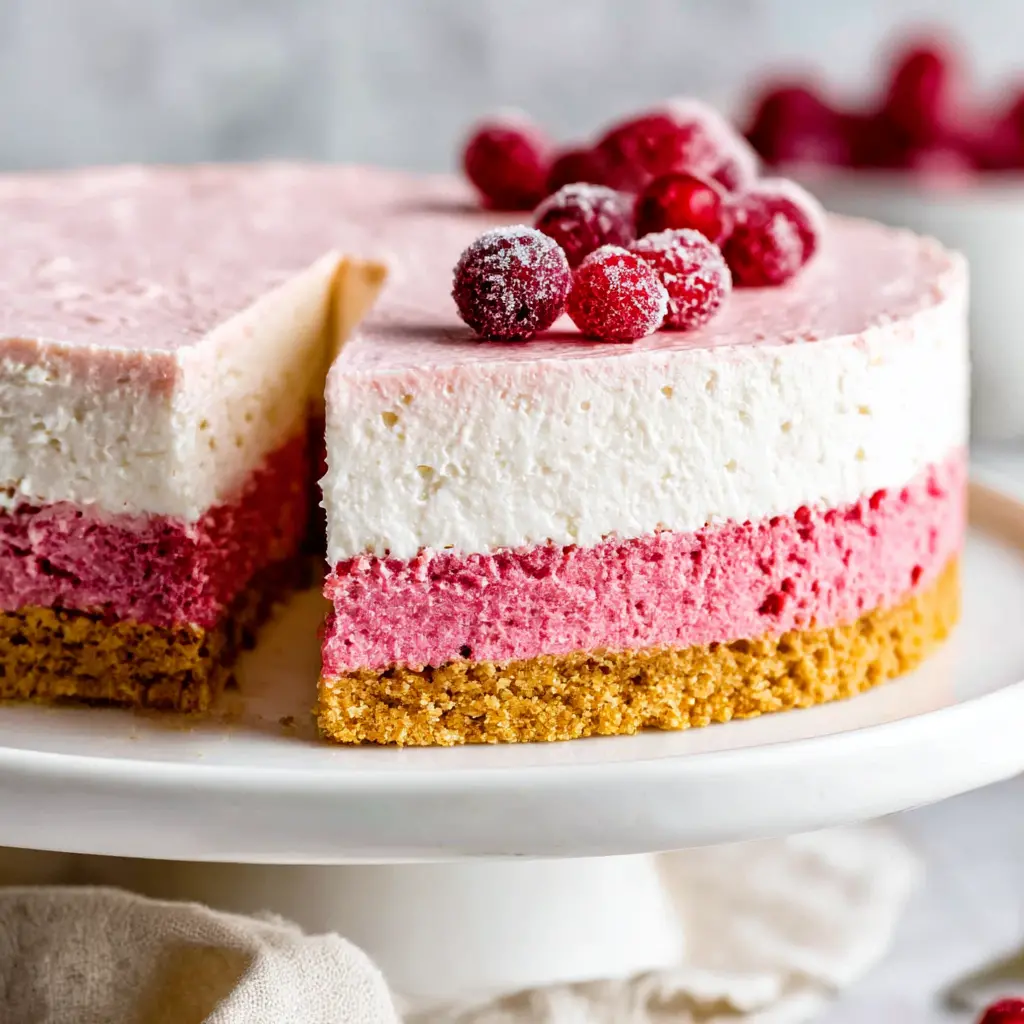
Why You’ll Love This Cranberry Mousse Cheesecake
Hosting the last cookout of summer? There’s always that moment when someone walks in with a dessert that makes the whole table quiet. This no-bake cranberry mousse cheesecake is how you become that person.
I’ll be honest, multi-layer desserts used to scare me. All those components, all that timing. But this is really three mini recipes, and each one takes about fifteen minutes. The fridge does the hard work while you sleep.
This cranberry mousse cheesecake has three distinct layers: a buttery Biscoff cookie crust, a silky cream cheese filling, and a bright tart berry mousse on top. No oven required. Which matters when it’s pushing 90 degrees and you’re hosting for Labor Day weekend.
Why This One Works
No oven. No water bath. No cracked tops, no fussy baking. Just a springform pan, a quick stop at the stove, and eight hours of chill time.
It’s a true make-ahead fridge dessert. Assemble it tonight, chill it overnight, and tomorrow you show up looking like a professional. The chilling time for cheesecake becomes your free time.
Key Ingredients & Substitutions
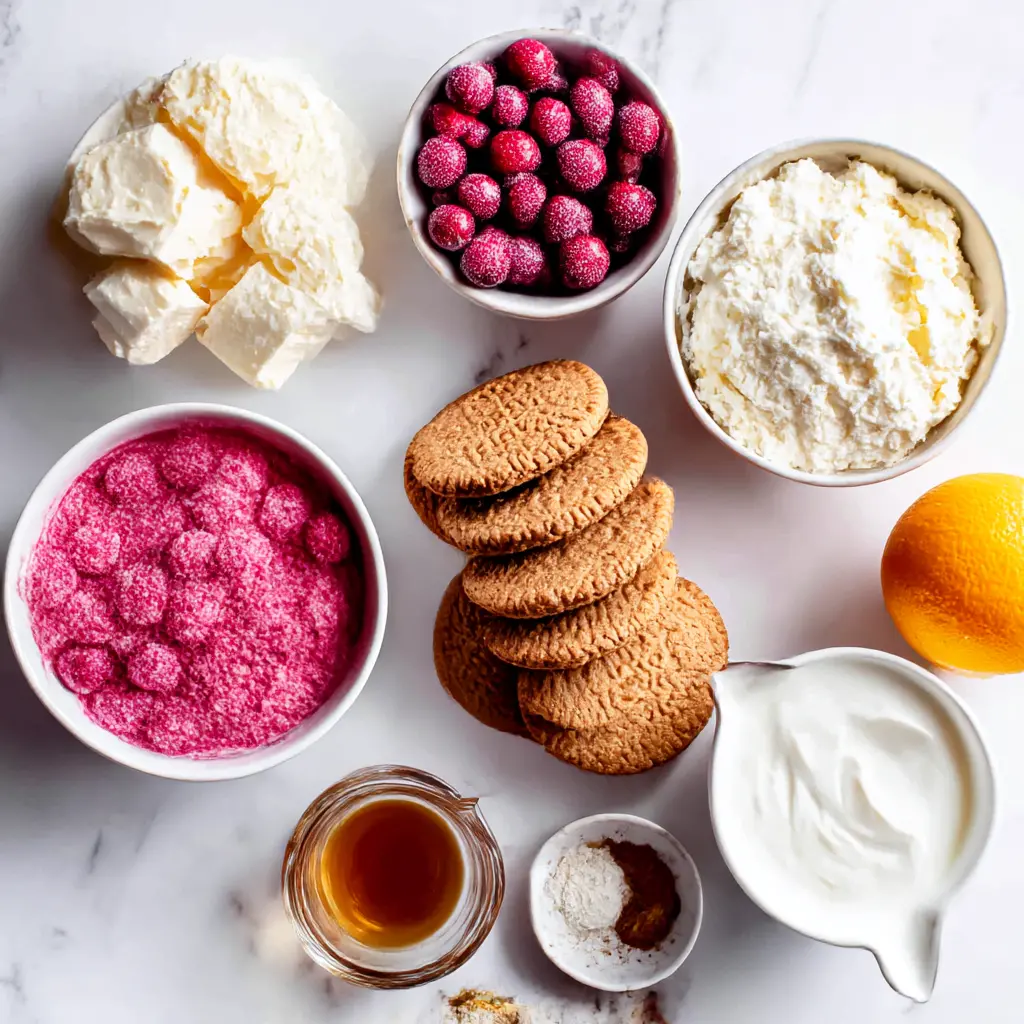
Everything in this cranberry mousse cheesecake pulls double duty. Here’s what matters most, plus the swaps that actually work.
Biscoff cookies. These spiced Belgian cookies give the crust a warm, caramelized flavor. Can’t find them? A graham cracker crust works beautifully. Gingersnaps give it even more holiday personality.
Cranberries. Fresh or frozen both work great. In August, fresh cranberries are basically a rumor, so frozen is your best friend. Do not thaw them. Just cook them a few minutes longer.
Maple syrup. It adds gentle sweetness without fighting the berries. Honey or agave both work fine. Stick with something mild.
Gelatin. This is the backbone of the mousse. It blooms in lemon juice for five minutes before hitting the warm cranberry mixture. Don’t skip that step. It’s the difference between clean slices and a puddle.
Cream cheese. Room temperature, full stop. Set it out an hour before you start or you’ll be fighting lumps all afternoon.
How to Make No-Bake Cranberry Mousse Cheesecake
I’ve broken this into four stages because thinking of it as one big project is overwhelming. These are the mini-wins.
Stage 1: Make the Biscoff Cookie Crust
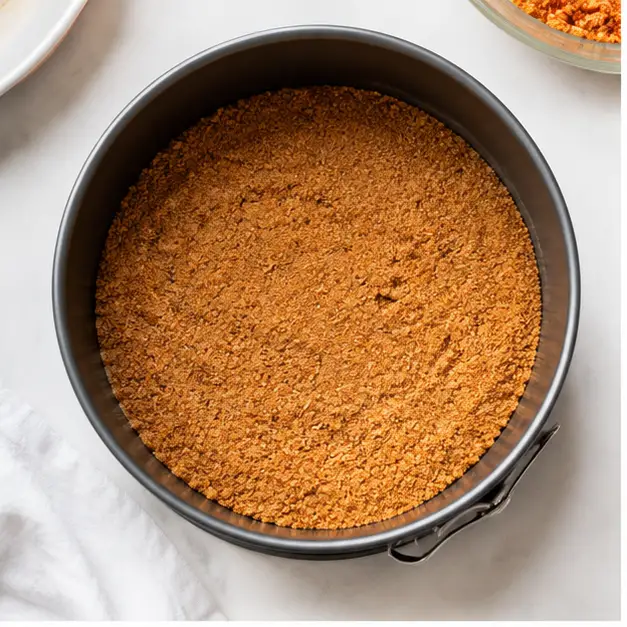
If you’ve ever made a graham cracker crust, you’ve basically done this. Pulse the Biscoff cookies into fine crumbs, stir in melted butter, and press the mixture into the bottom of a lined 6-inch springform pan.
Here’s the trick: freeze the crust while you prep everything else. The freezer sets the butter without touching the oven, so your kitchen stays cool. It also prevents a soggy crust later. That little freeze is doing real work.
Stage 2: Make the Cranberry Mousse
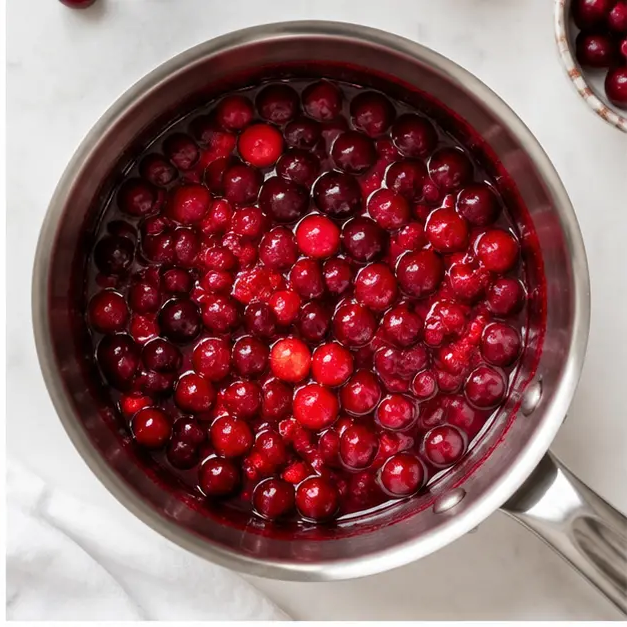
This is where it gets fun. Cook the cranberries with maple syrup, orange juice, cinnamon, and a bit of fresh ginger until the berries burst and release their liquid. About 8 to 10 minutes. The whole kitchen starts smelling like the holidays, which is surreal in August, but I’m not mad about it.
About five minutes before the berries finish, sprinkle the gelatin over lemon juice and let it bloom. Then whisk it into the warm cranberry mixture until fully dissolved. Strain everything through a fine mesh sieve, pressing hard to get every drop of that gorgeous ruby juice. Discard the pulp.
Here’s the mistake I made the first time: I folded whipped cream into warm cranberry sauce and watched my beautiful mousse turn into soup. Let the cranberry sauce cool completely to room temperature before the next step. Set a timer. Trust me.
Stage 3: Make the No-Bake Cheesecake Filling
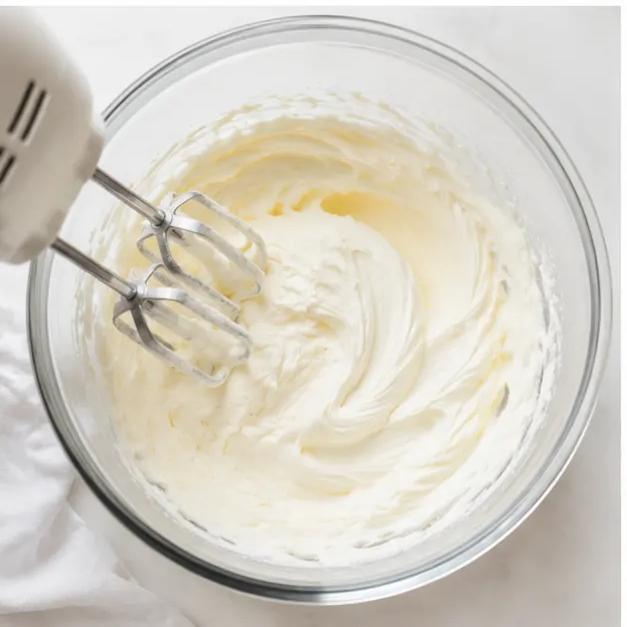
Beat the room temperature cream cheese with powdered sugar, vanilla, and a squeeze of lemon juice until completely smooth. No lumps. Run a spatula through it and hunt down any stragglers.
In a separate bowl, whip the heavy cream to stiff peaks. Fold it into the cream cheese with slow, gentle strokes. You want to keep all that air in. Think of it as tucking in a blanket, not stirring soup.
The result should be light, airy, and silky smooth in texture. This folded whipped cream technique is the same one you’ll use for the cranberry layer, so you’re basically practicing twice.
Stage 4: Assemble and Chill
Spread the cheesecake filling over the frozen crust and pop it in the fridge while you finish the mousse. Whip the remaining cream to stiff peaks and fold it into the cooled cranberry sauce until no white streaks remain.
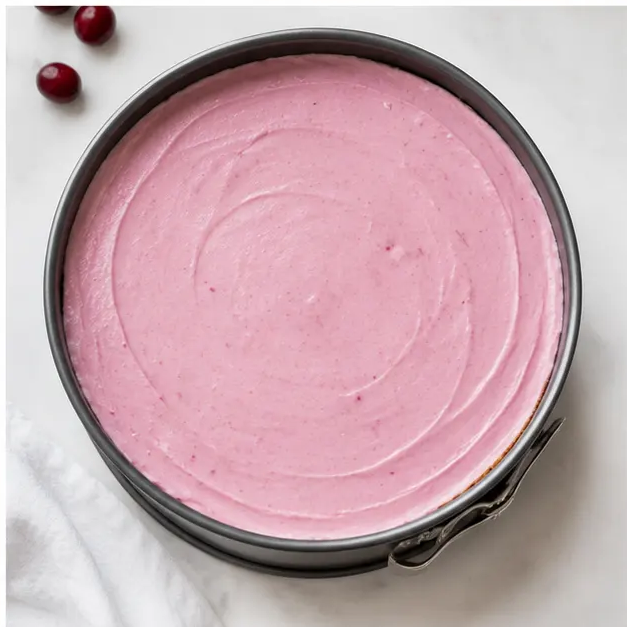
Pour the cranberry mousse over the filling, smooth the top, and cover the pan. Now the hard part: waiting. This cranberry mousse cheesecake needs at least 8 hours in the fridge, ideally overnight. The gelatin needs that chilling time to set properly. Don’t rush it.
Tips for Perfect No-Bake Cheesecake
Making a cranberry mousse cheesecake comes with a few potential pitfalls. Here’s how to dodge them, learned the hard way so you don’t have to.
❌ Cold cream cheese → ✅ Let it sit at room temperature for at least an hour. It blends smooth instead of lumpy.
❌ Over-whipped cream → ✅ Stop at stiff peaks. If it looks curdled or slightly yellow, start over with fresh cream.
❌ Warm cranberry mixture meeting whipped cream → ✅ Wait until the bowl feels cool to the touch. Warmth is the enemy.
❌ Skipping the parchment → ✅ Line the springform pan bottom with a parchment circle and press a strip around the inside wall. The crust releases cleanly instead of crumbling.
❌ Slicing with a dull knife → ✅ Dip a sharp knife in hot water, wipe it dry, and slice. Repeat between cuts for bakery-clean edges.
Serving & Garnish Ideas
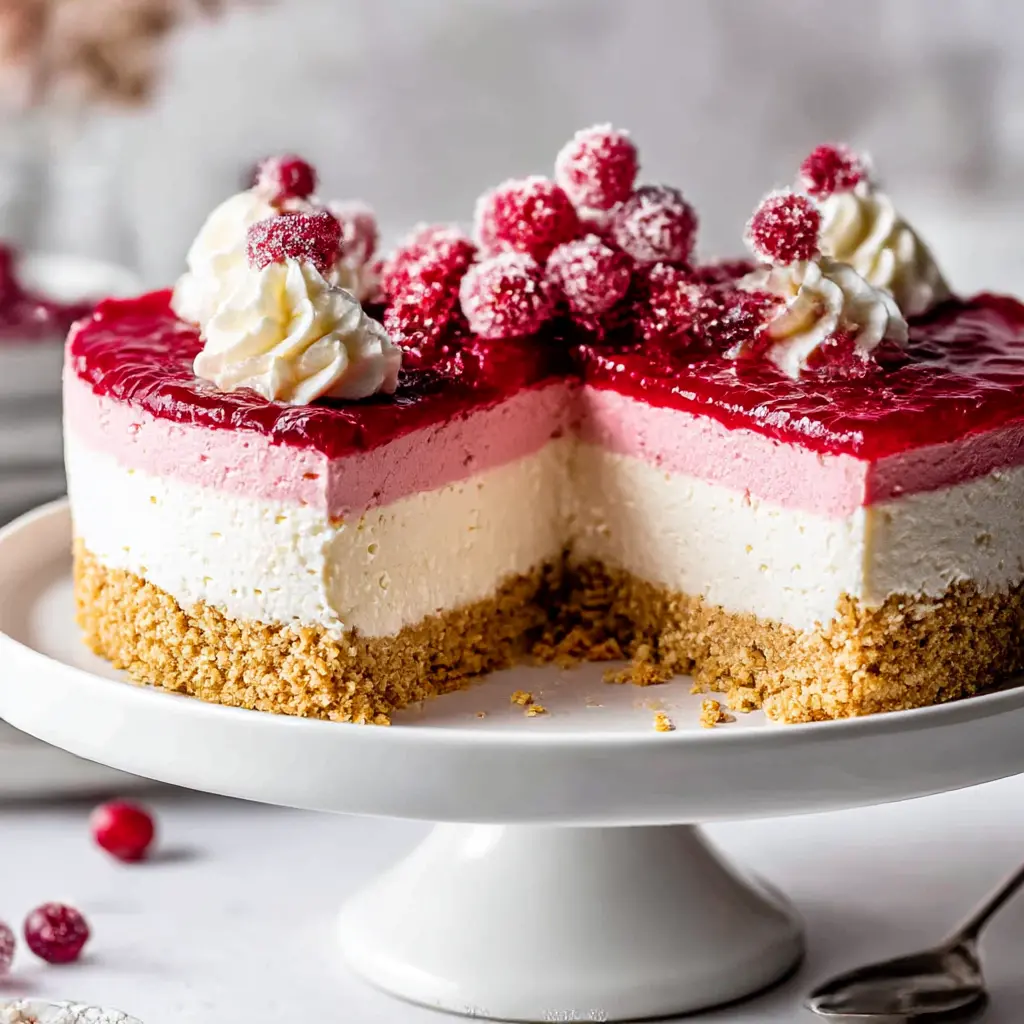
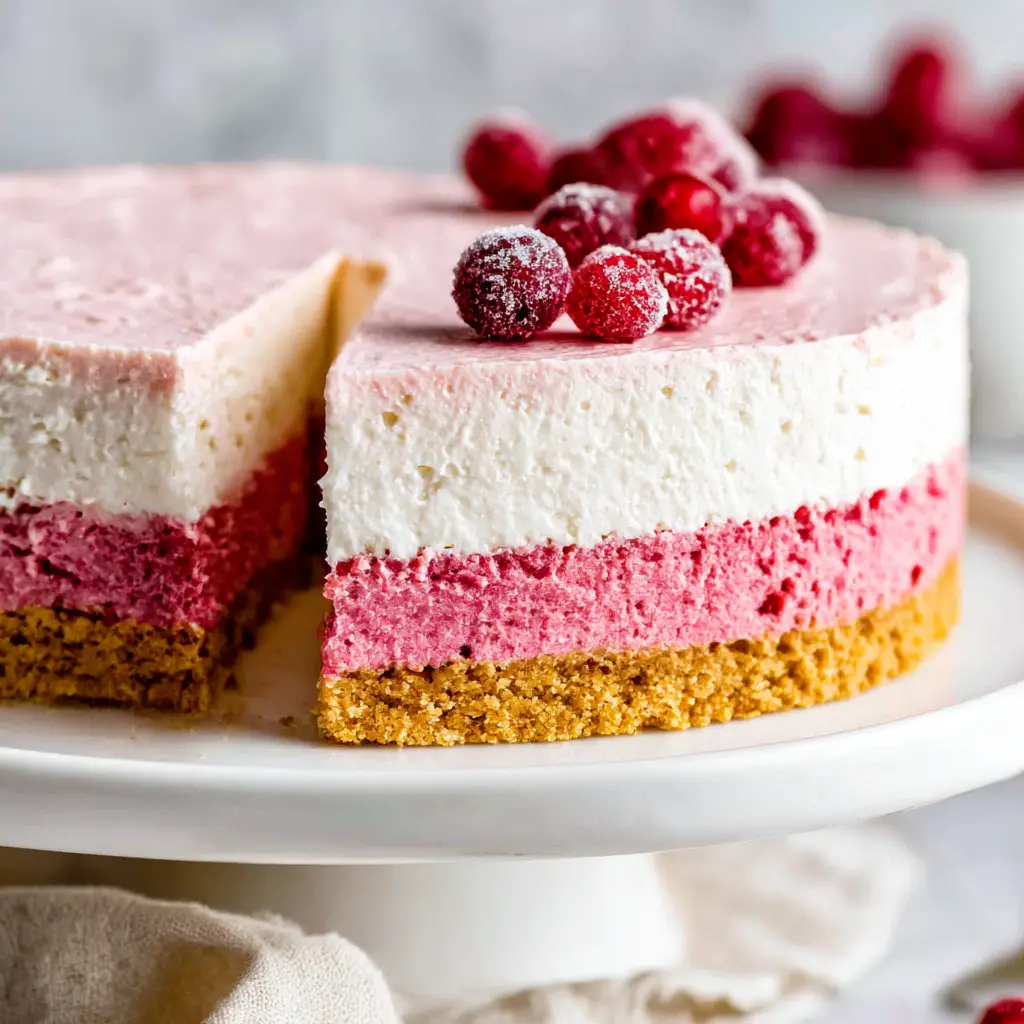
When this cranberry mousse cheesecake comes out of the fridge, the top should be pale pink and glossy, with that deep golden crust waiting underneath. Slice into it and you’ll see three clean layers: crisp crumb, creamy white filling, and cloud-like berry mousse.
Garnish with sugared cranberries and an extra dollop of whipped cream if you’re feeling festive. Add them right before serving so the sugar stays sparkling and the cream stays fluffy. Every cranberry mousse cheesecake deserves a crown.
The tart and sweet balance is what makes this dessert sing. Bright tangy berries against sweet cream and warm spice. It’s a holiday dessert centerpiece that feels just as right at an end-of-summer potluck. Come December, this becomes your Christmas cranberry cheesecake, just switch up the garnish.
Storage & Make-Ahead Instructions
This cranberry mousse cheesecake might be the most make-ahead friendly dessert I know. You can build the whole thing two days before your event and just pull it out when the doorbell rings.
- Refrigerator: Store covered for up to 5 days.
- Freezer: Wrap tightly and freeze for up to 3 months. Thaw overnight in the fridge.
- Garnishes: Add them after thawing, never before.
- Slicing: A 6-inch cake gives you 4 to 6 generous pieces.
For a potluck or gathering, this is your dessert. It travels well, it slices cleanly, and it’s the kind of thing people ask about before they finish their first bite. Think of the berry layer as a quick homemade cranberry jam filling, it’s doing a lot of heavy lifting in this cake.
Final Thoughts
Here’s what I want you to know: you don’t need to be a pastry chef to pull this off. Every ingredient is simple, every step is forgiving, and the fridge does the hardest part. That’s the beauty of this no-bake cheesecake recipe.
When you slice into that first piece and see those clean layers, and the table goes a little quiet after the first bite, that’s the recipe working. That’s you winning.
If you make this cranberry mousse cheesecake, I’d love to see it. Come find me on Pinterest and show me your cranberry swirls. I genuinely get excited seeing these come together in other people’s kitchens.
You’ve got every ingredient, every tip, and every bit of ability. Go impress yourself.
Cranberry Mousse Cheesecake (No-Bake)
Ingredients
Method
- Set a 6-inch springform pan on a work surface, detach the bottom, line it with a parchment circle, then lock the ring back in place. If desired, press a parchment strip against the inside wall to keep the cake from sticking.
- Place the Biscoff cookies in a food processor and pulse until crumbly. Pour in the melted butter and pulse again until the crumbs are fine and evenly moistened.
- Transfer the crumb mixture to the prepared pan and press it firmly and evenly into the bottom using your fingers or a flat-bottomed measuring cup. Freeze the crust while you prepare the fillings.
- Add the cranberries, maple syrup, orange juice, cinnamon, and grated ginger to a medium saucepan. Cook over medium heat, stirring occasionally, until the berries burst and release their liquid, about 8 to 10 minutes.
- About 5 minutes before the cranberries are done, sprinkle the gelatin over the lemon juice in a small bowl and let it bloom for 5 minutes. Add it to the pan and whisk until completely dissolved.
- Pour the cranberry mixture into a fine-mesh strainer set over a bowl. Press the berries with the back of a spoon to extract all the juice, then scrape the underside of the strainer to collect every bit. Discard the pulp and let the cranberry sauce cool to room temperature.
- In a medium bowl, beat the cream cheese, powdered sugar, vanilla, and lemon juice with a hand mixer on medium speed until smooth.
- In a separate bowl, beat the heavy cream on high speed until stiff peaks form.
- Gently fold the whipped cream into the cream cheese mixture with a spatula, using slow strokes to keep the cream airy. Reserve the whipped cream bowl for the mousse.
- Take the crust out of the freezer and spread the cheesecake filling evenly over it. Place the cheesecake in the refrigerator while you finish the mousse.
- Use the reserved bowl to whip the heavy cream for the mousse on high speed until stiff peaks form.
- Lightly fold the whipped cream into the cooled cranberry sauce until no white streaks remain, taking care not to deflate the cream.
- Remove the cheesecake from the refrigerator, pour the cranberry mousse over the filling, and smooth the top with a small spatula. Cover the pan with plastic wrap and chill for at least 8 hours or overnight.
- To serve, release the springform ring and carefully remove the parchment collar. Use a large spatula and the bottom parchment to lift the cake onto a serving plate, then slide the parchment out from underneath.
- Slice with a knife warmed in hot water and wiped dry. Garnish with sugared cranberries and extra whipped cream if you like.
Nutrition
Notes
Tried this recipe?
Let us know how it was!Frequently Asked Questions
Source: Learn More About This Dish